Utilizing Ambassadors to Scale a Program

Kyle Kettner
Jan 24, 2019
4 minutes read
Growing an ambassador program can be a challenge. However, with your ambassador’s help, you can save time on finding new participants and quickly grow your program.
When ambassadors refer their closest friends, you can now approach the people that your ambassador’s know, trust and think will be a good fit in the program. The ambassador’s friends are also more likely to sign up for your program because they have been referred by a trusted source.
Getting your ambassadors to refer friends to your program can be easily accomplished with a brand ambassador management software like BrandChamp. By offering recruiting tasks, you can mobilize and reward ambassadors with points for promoting your program and referring their friends.
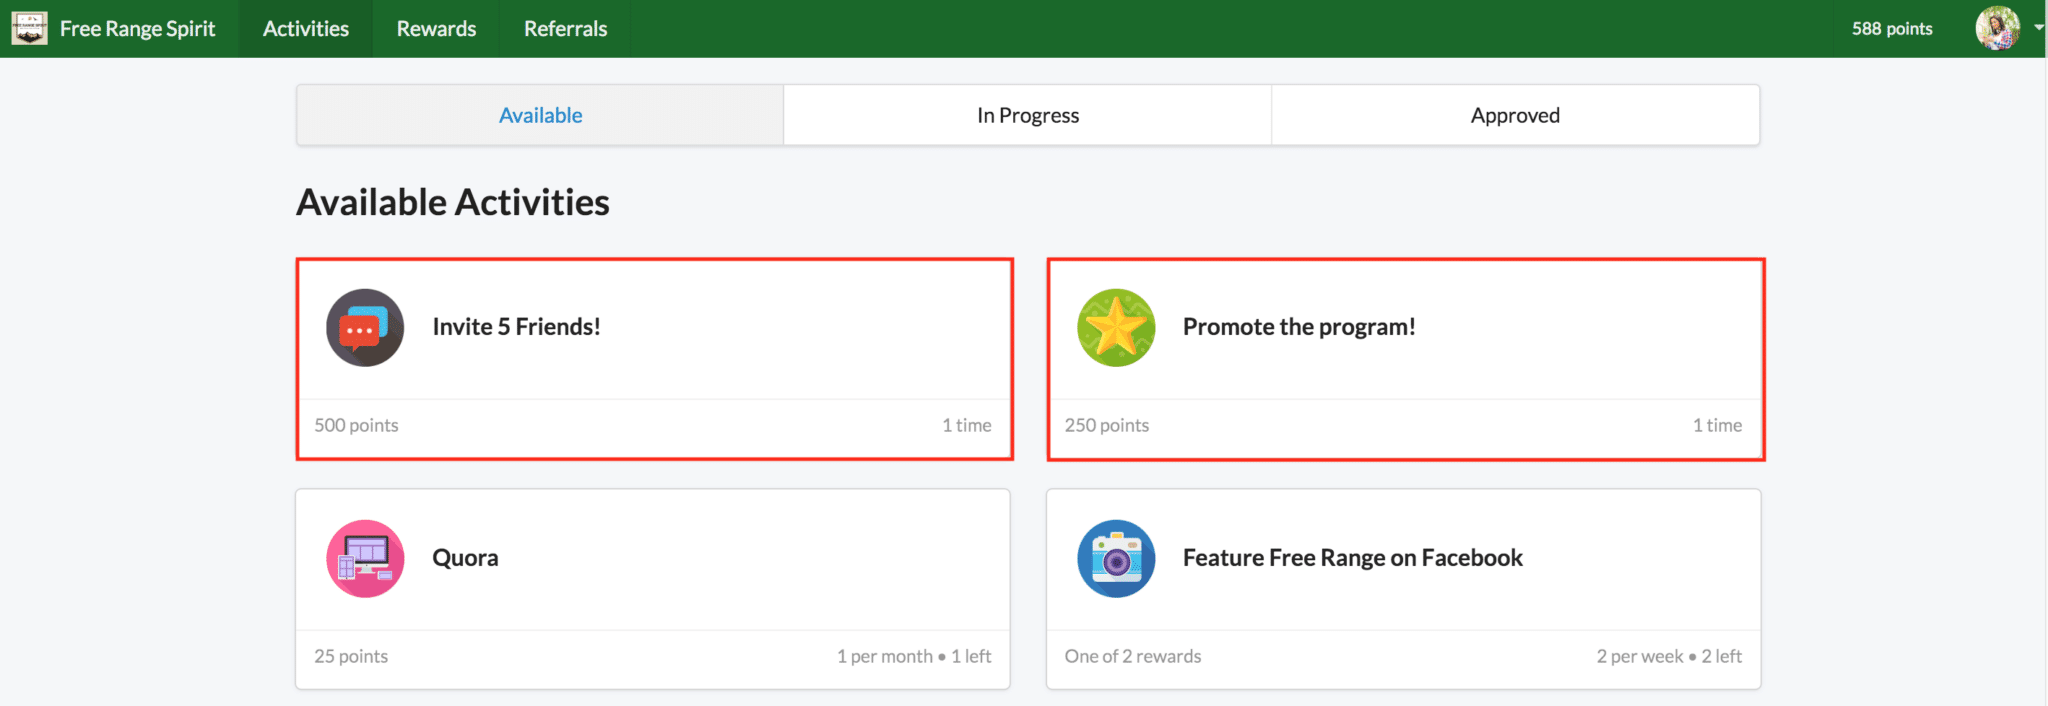
In this video, 2 recruiting activities will be created. The first activity that is set up allows the ambassador to share the names and emails of 5 friends. For the second activity, the program’s application link will be shared with the ambassador so that they can promote the program and direct people to the application.
After creating the two activities, an email update will be composed and sent to ambassadors informing them about the new activities.

How Legion Athletics Scaled to Millions in Annual Revenue with BrandChamp
Building Recruiting Activities
In this blog, you will learn how to:
- Create 2 recruiting activities
- View the Activity’s Presentation in the Ambassador Portal
- Send an email update about recruiting activities
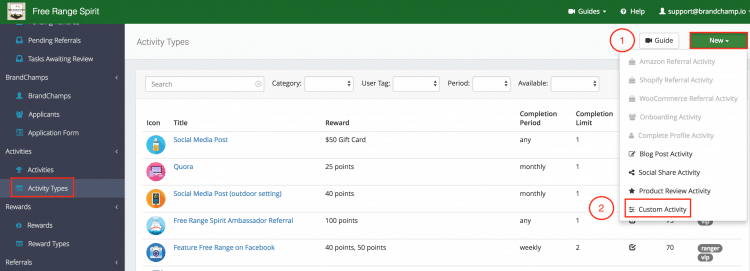
To start, you will create 2 recruiting activities in the “Activity Types” page under the “Activities” section.
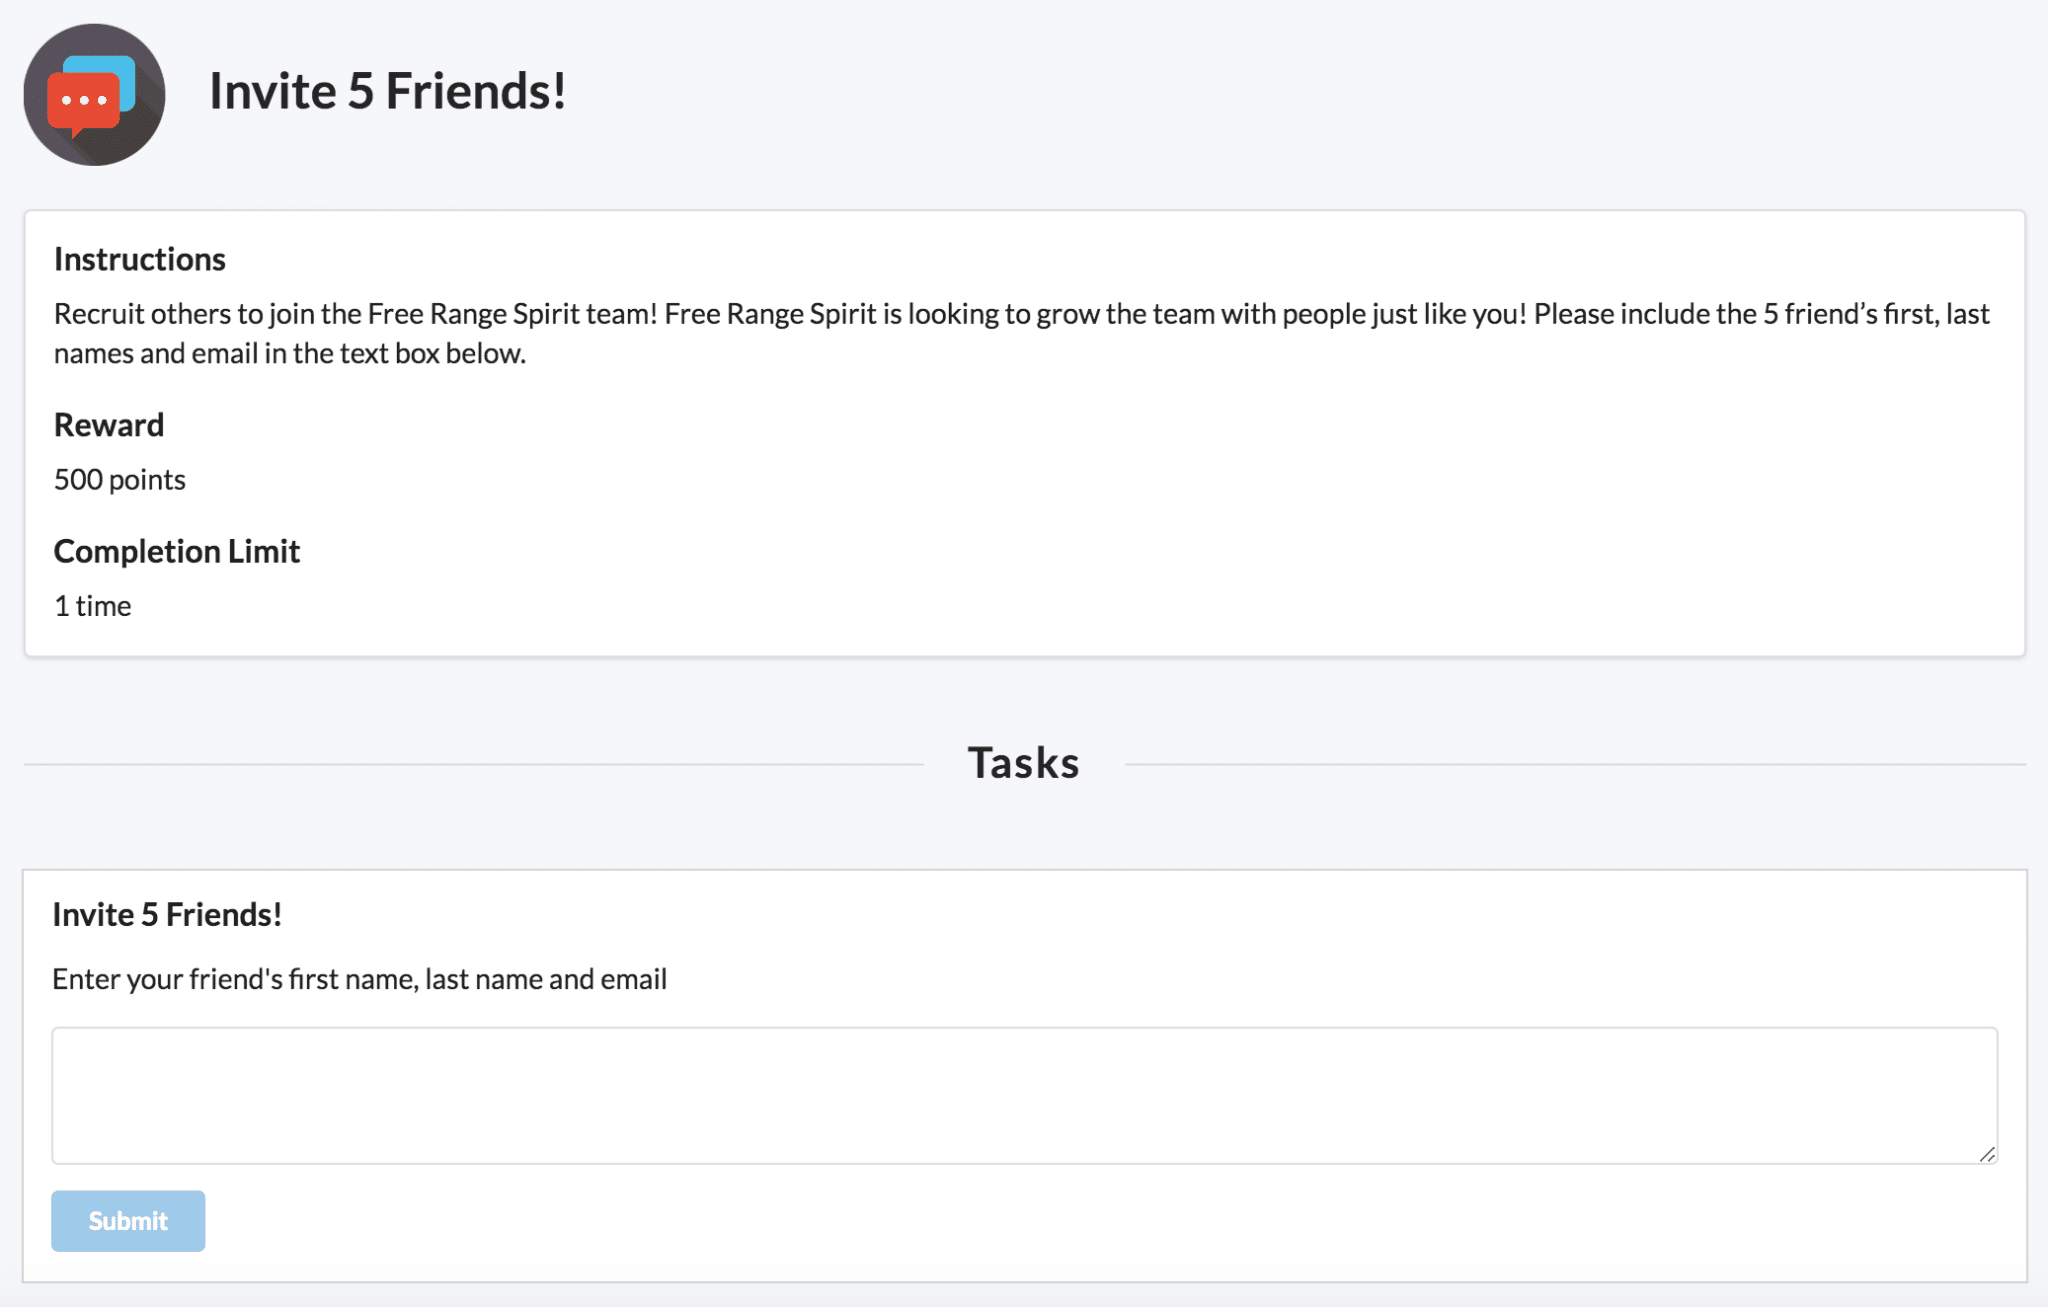
Recruiting Activity #1
The goal of this activity will be to allow our ambassadors to refer 5 of their friends.
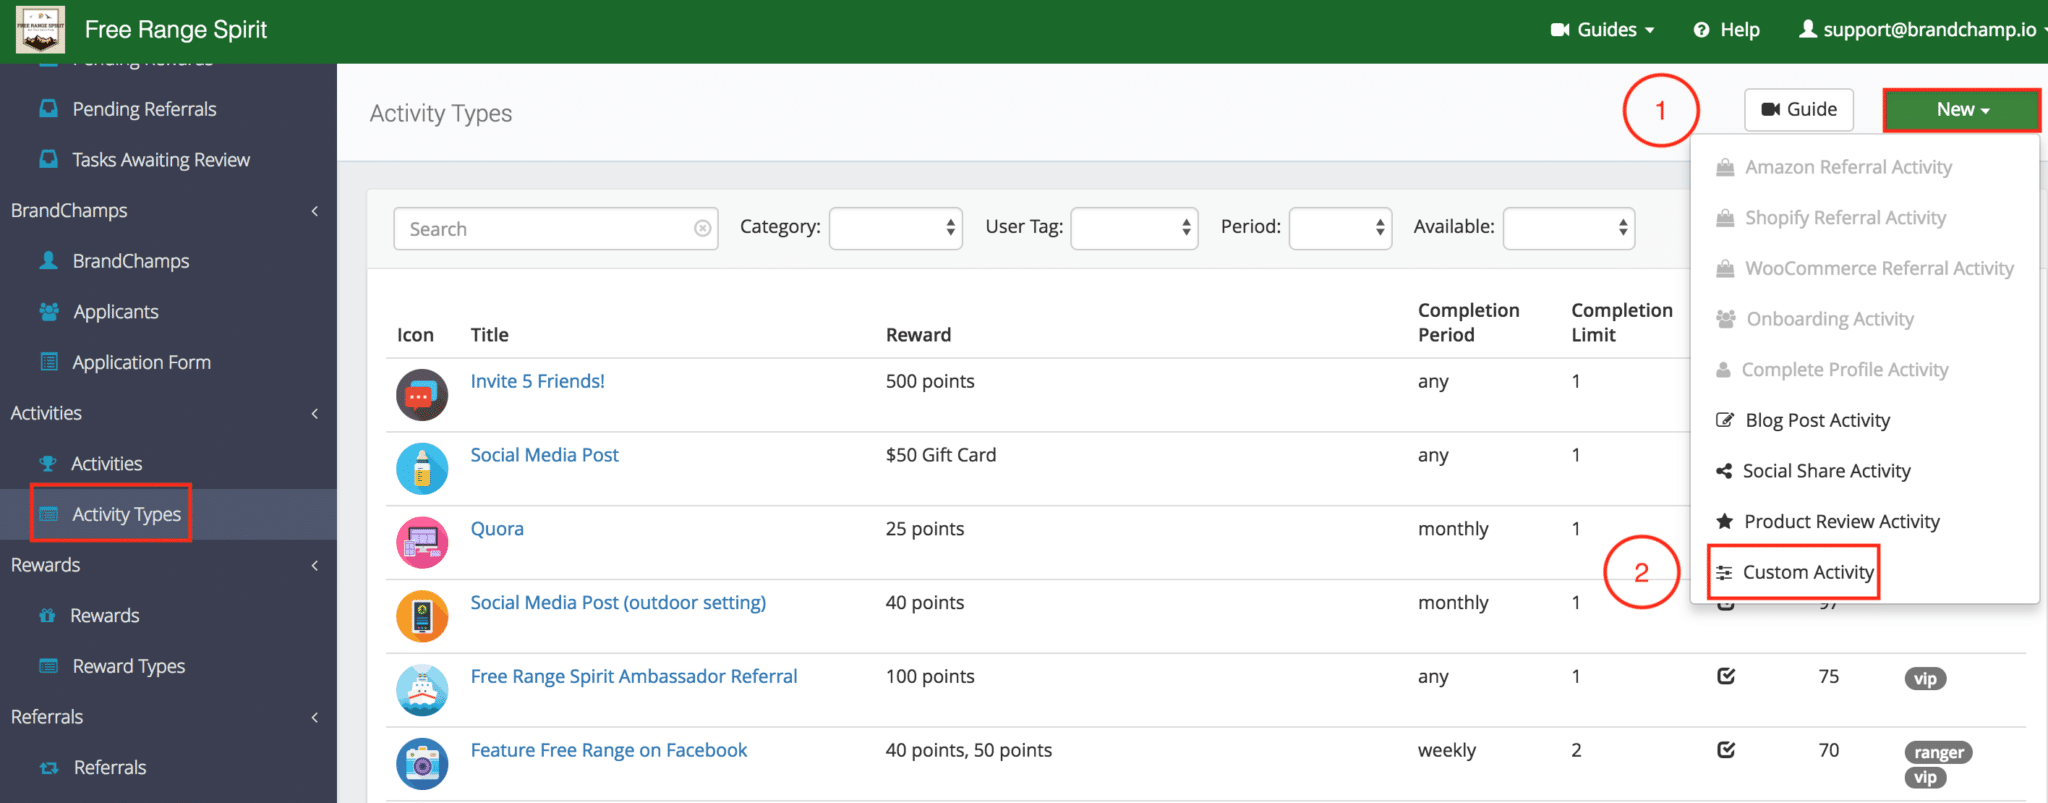
In the “Activity types page:
- Click “New”
- Select “Custom Activity”
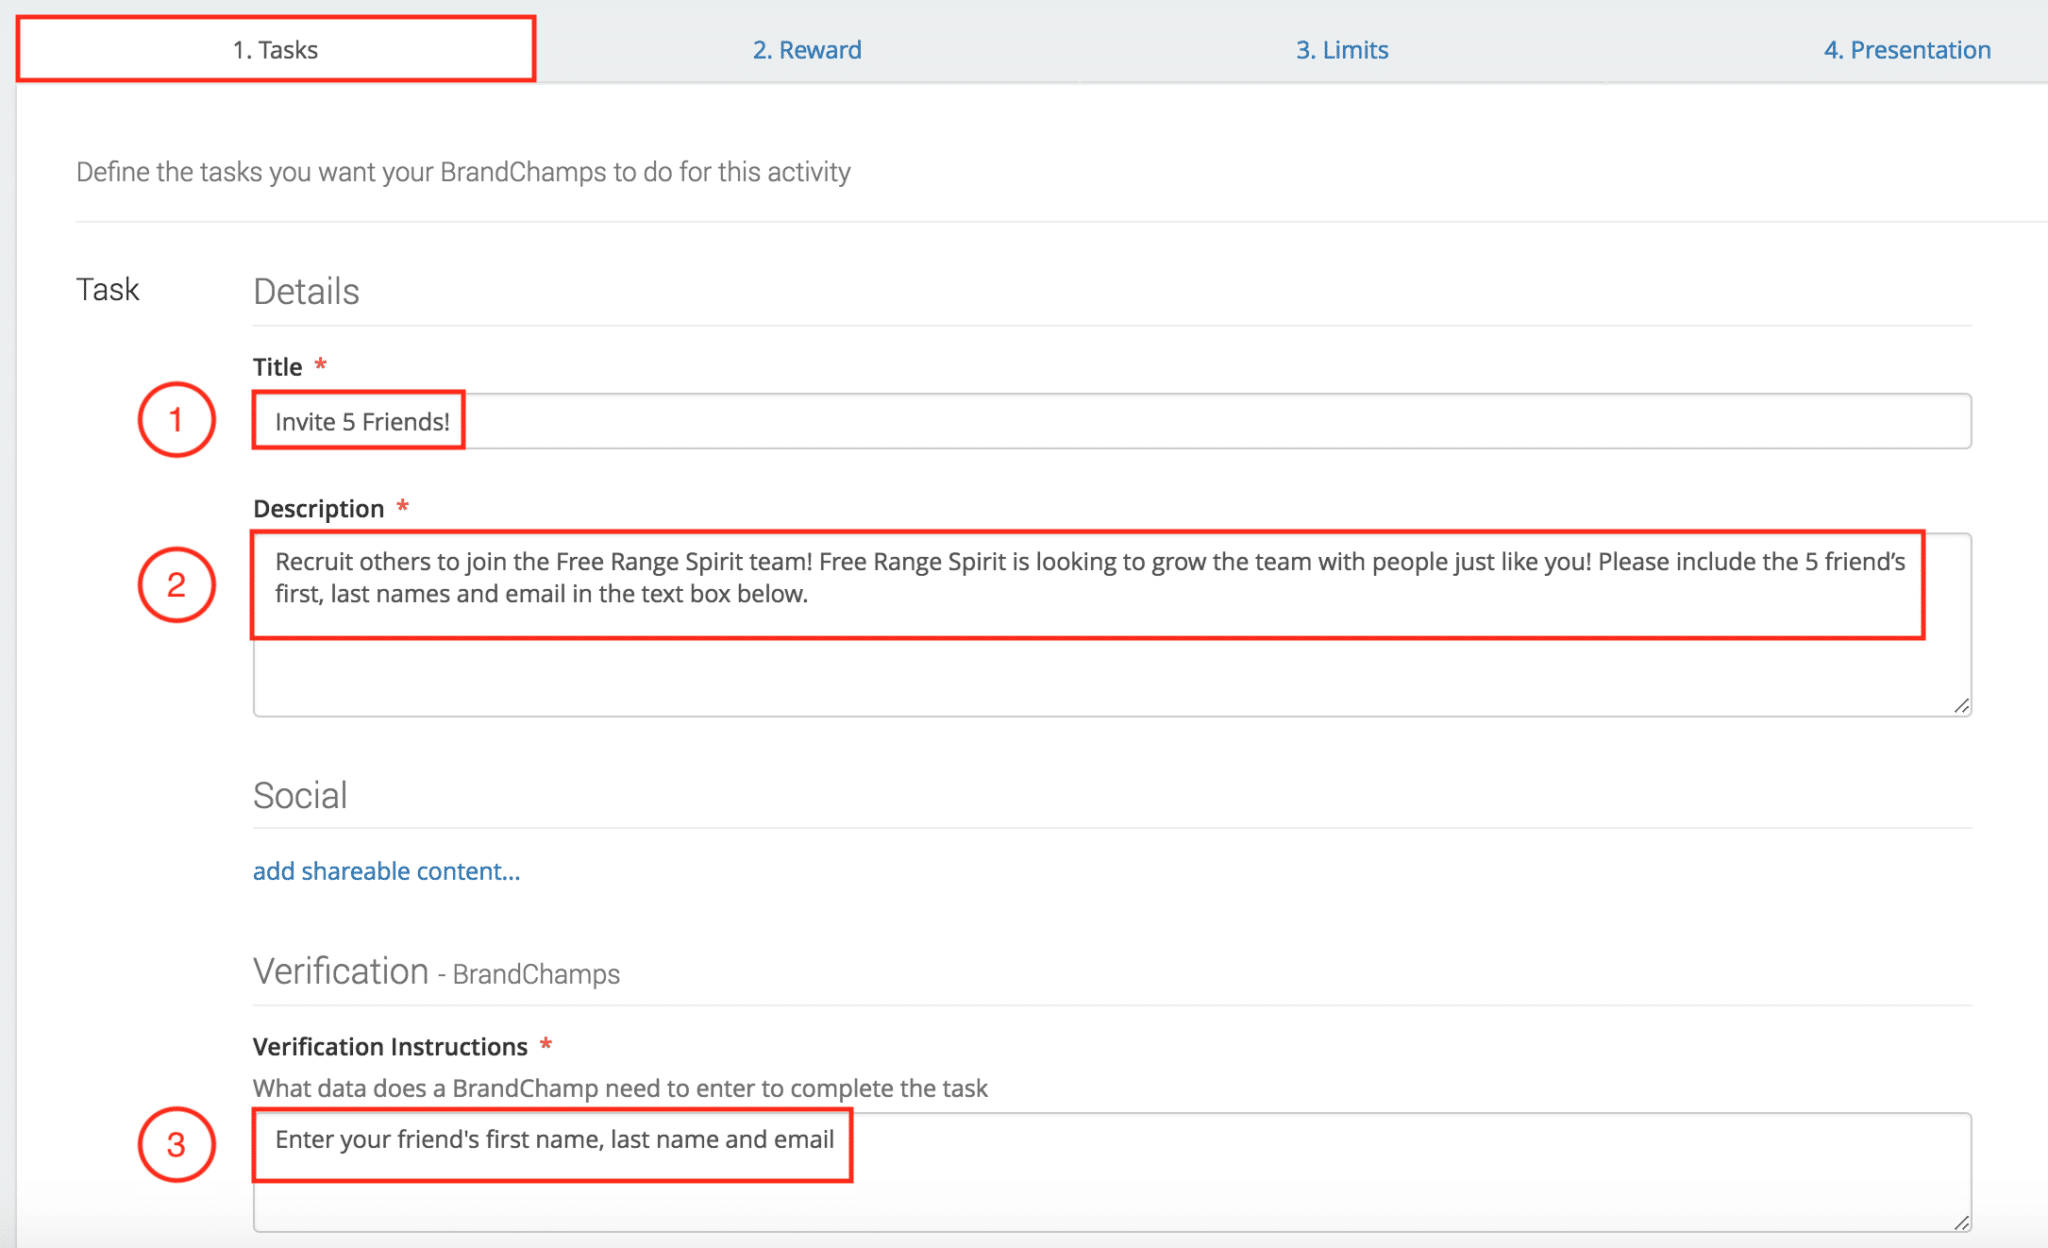
- Enter the Title – “Invite 5 Friends!”
- Enter the Description – “Recruit others to join the Free Range Spirit team! Free Range Spirit is looking to grow the team with people just like you! Please include the 5 friend’s first, last names and email in the text box below.”
- Enter the Verification Instructions – “Enter your friend’s first name, last name and email”
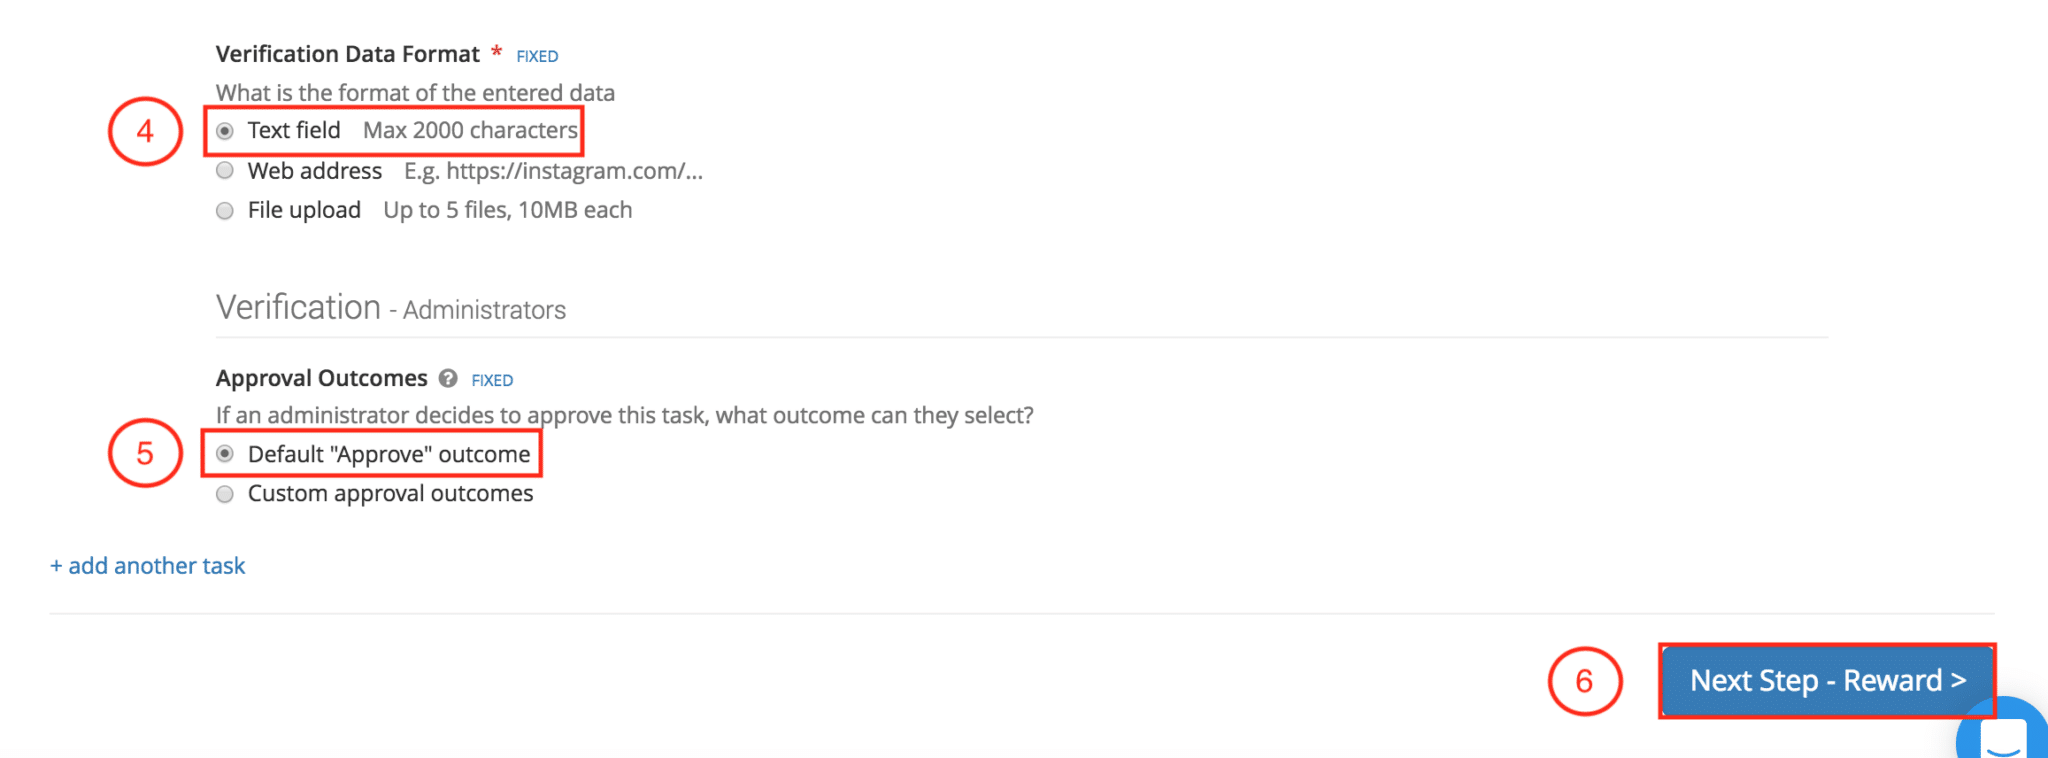
The next is section is “Verification Data Format”:
- Select“Text Field”This will allow the ambassador to type in their friend’s information
- Select “Default “Approve” Outcome”A Default Approve Outcome will allow you to either “Approve” or “Reject” an activity
- Click “Next Step – Reward”
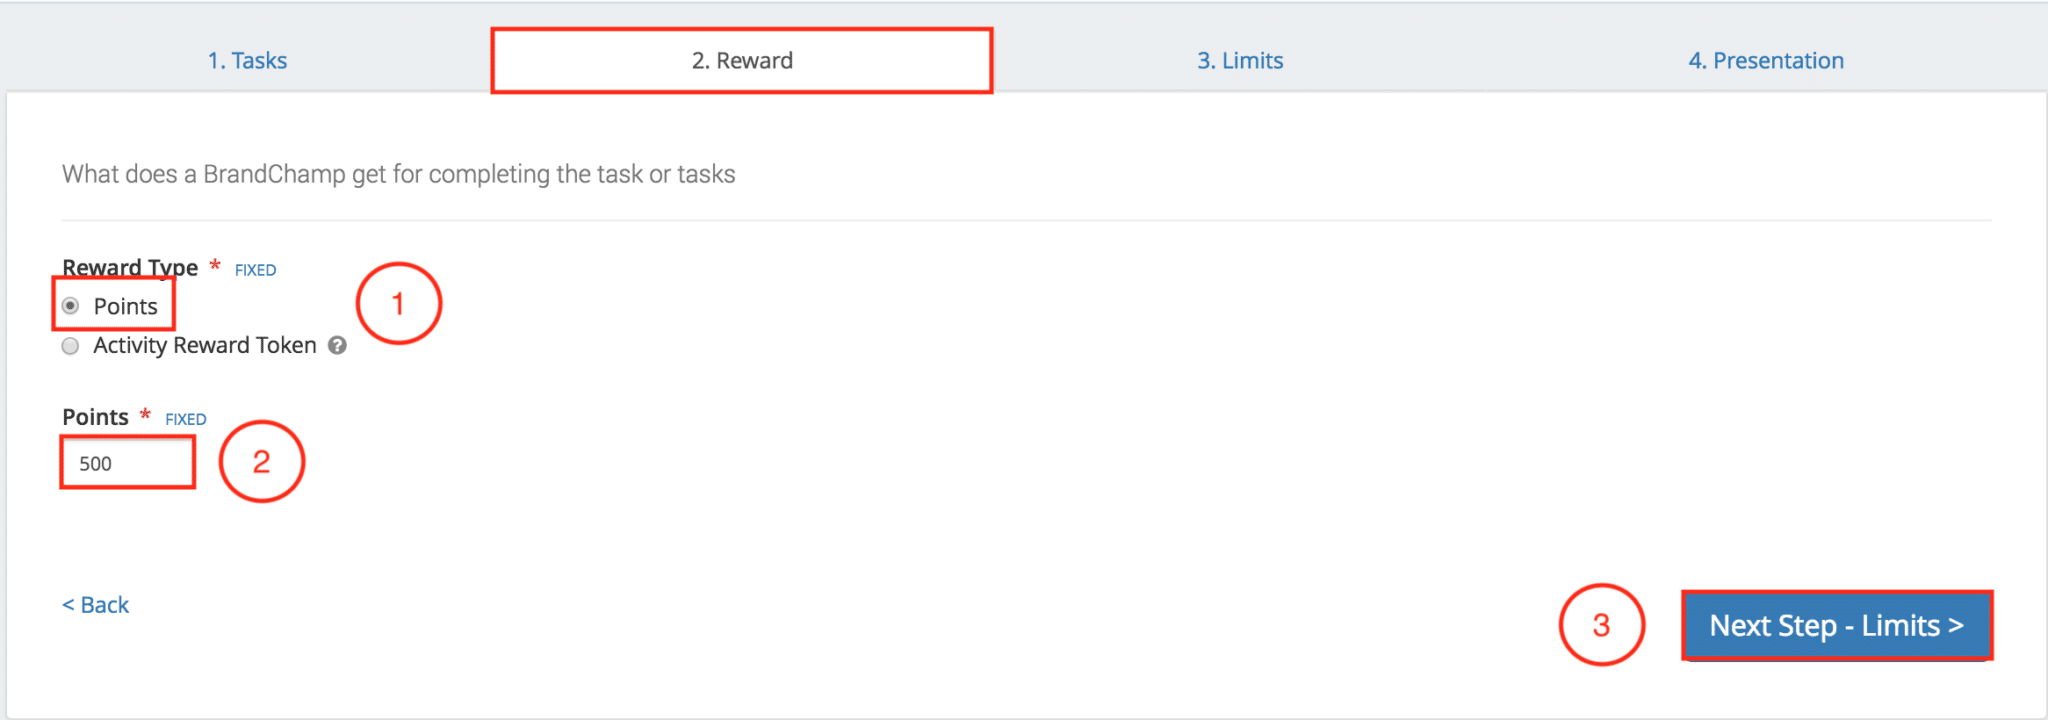
To set up the reward:
- Select “Points”
- Enter “500” points
- Click “Next Step – Limit”
In the “Limits” tab:
- Select “Any”
- Enter “1”for completion limit”
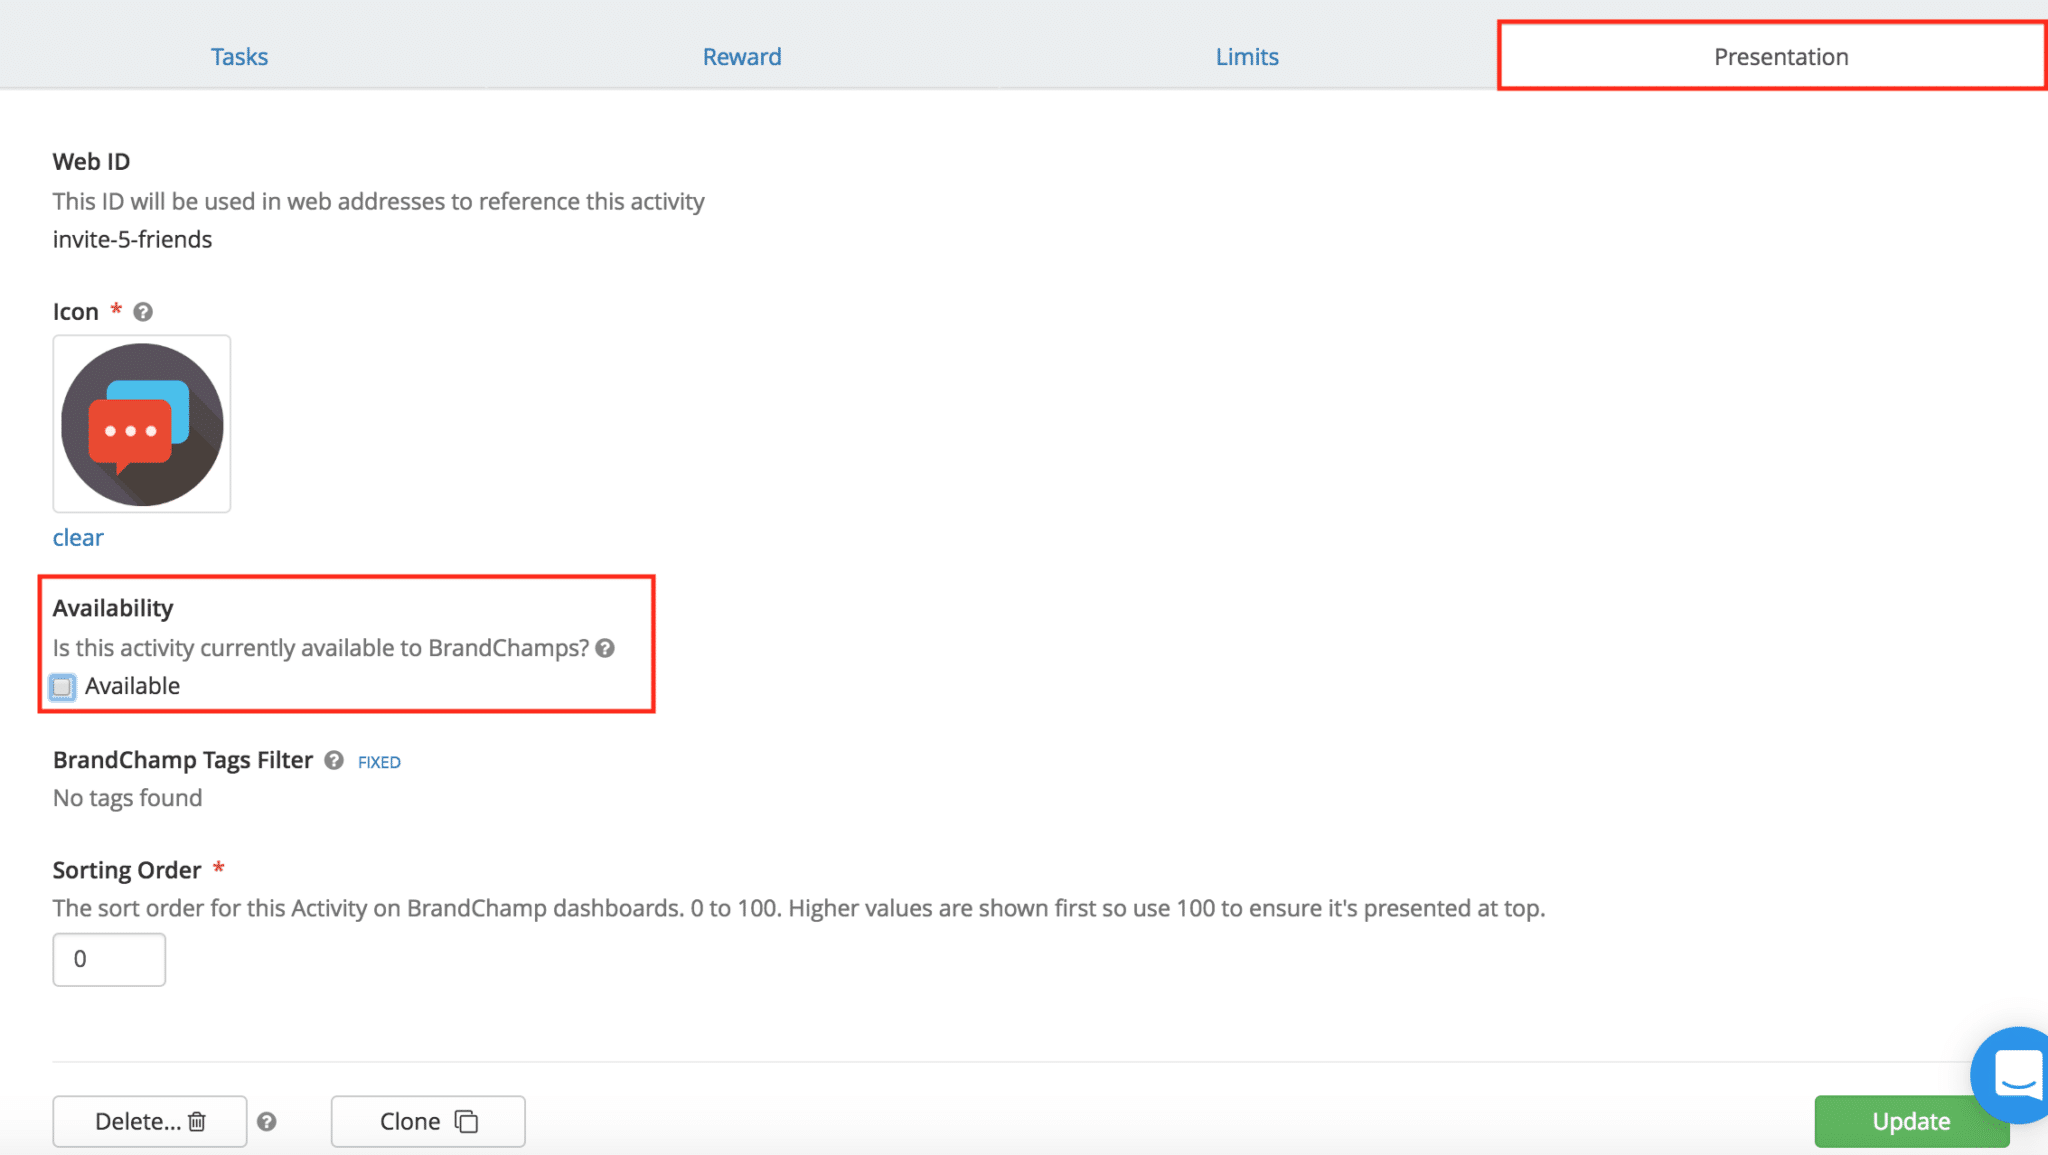
- Click “Next Step – Presentation”

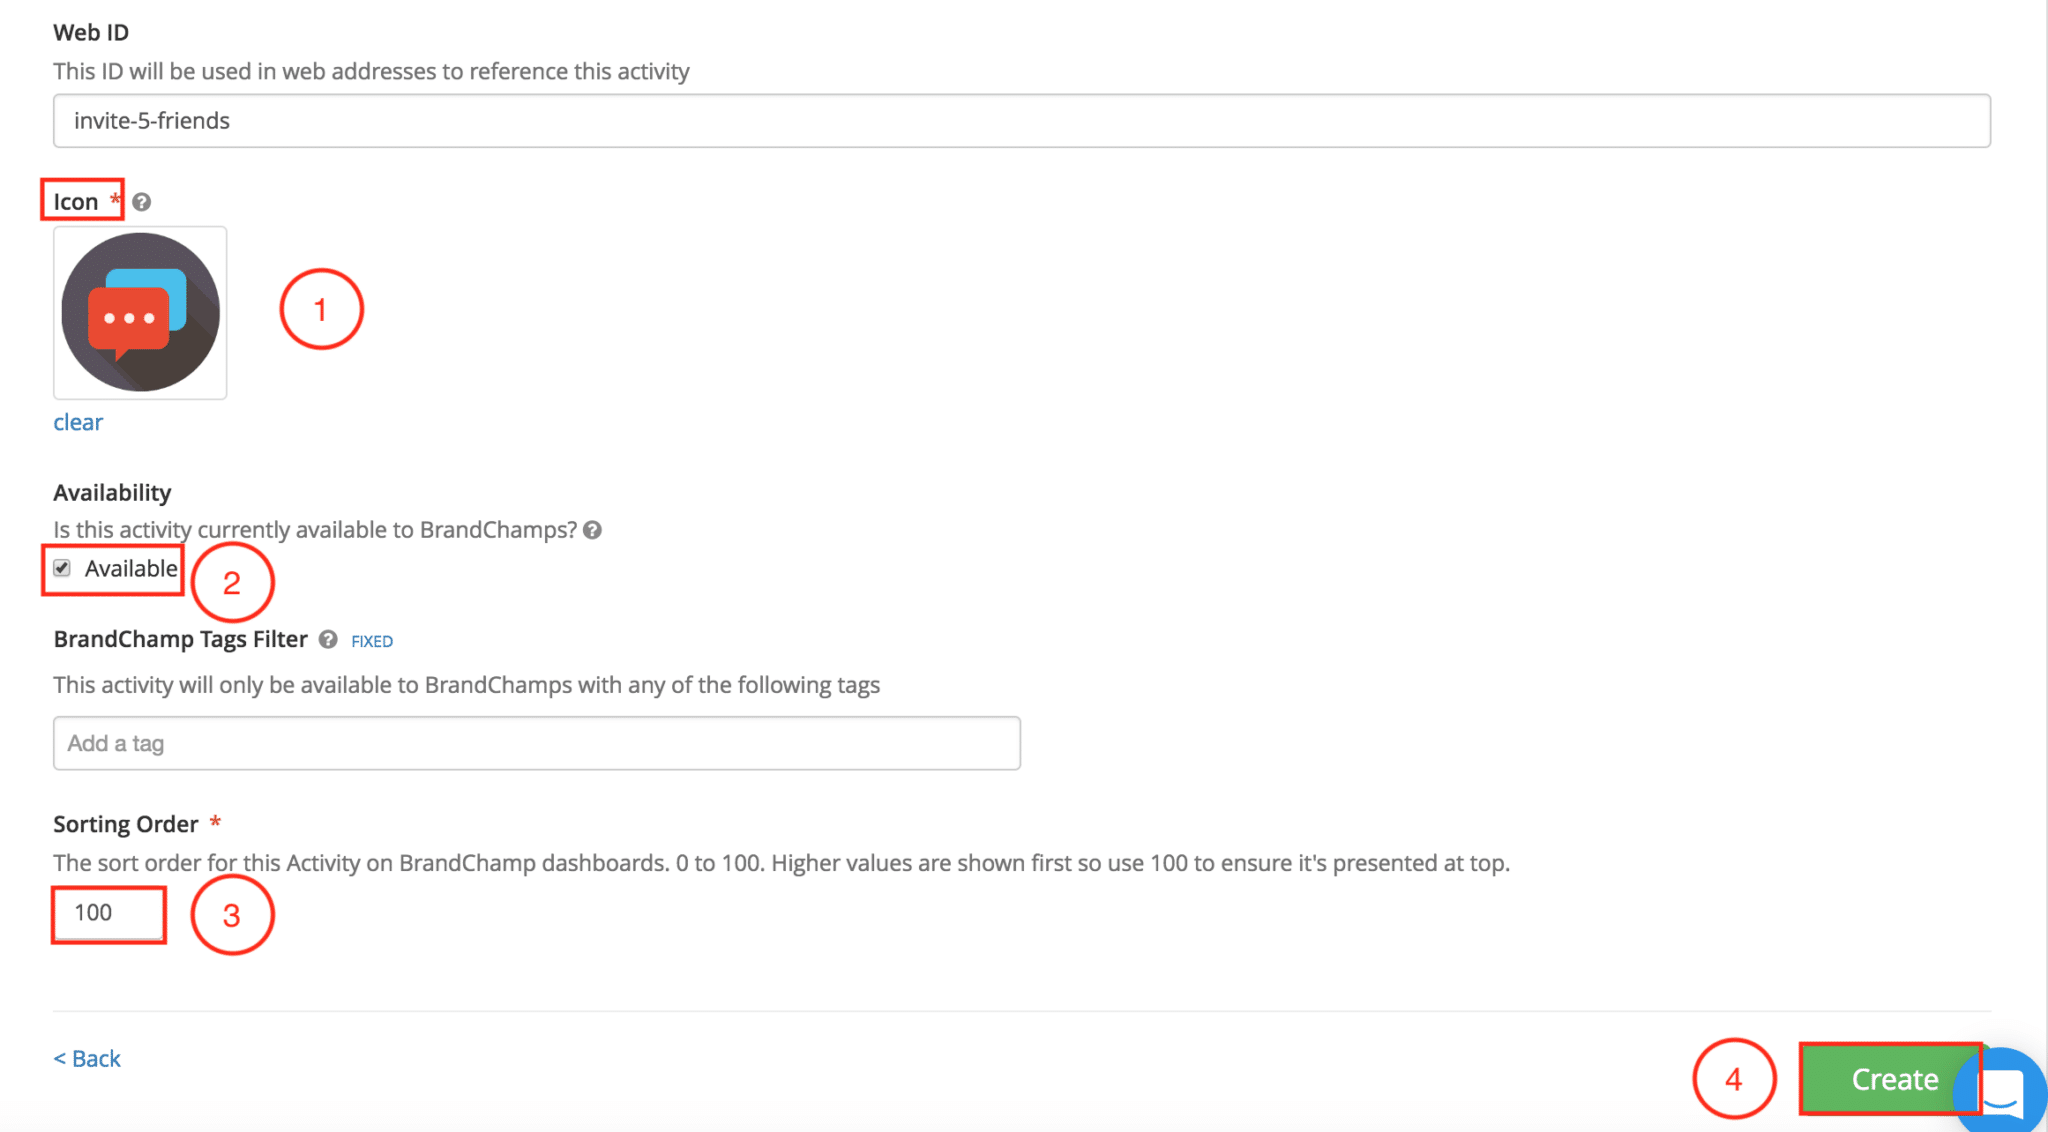
- Select an “Icon”
- Mark the activity “Available”
- Enter “100 Sorting Order”This will place the activity at the top of the ambassador’s activity list
- Click “Create”
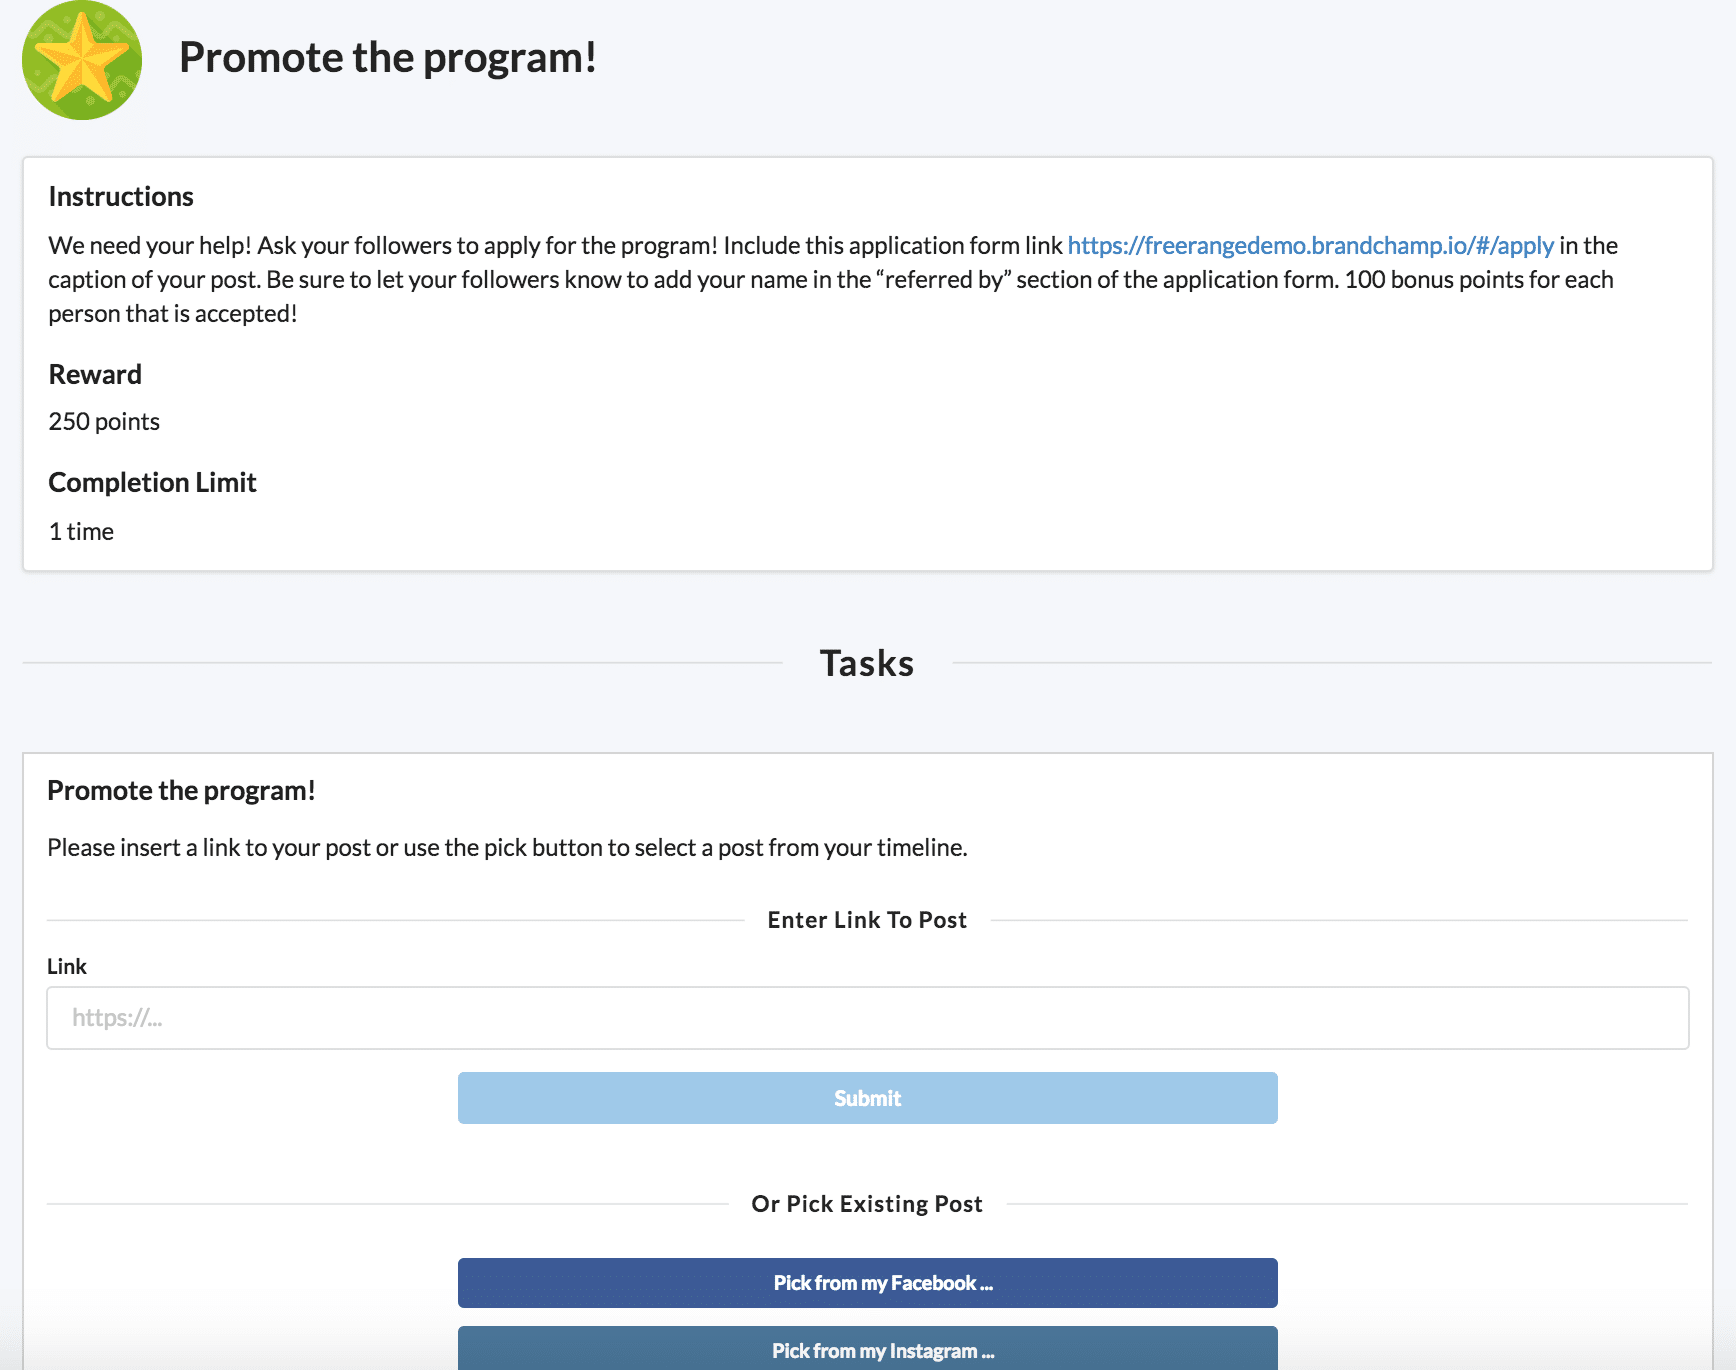
Recruiting Activity #2
The purpose of this activity is to provide ambassadors with the link to your application form so ambassadors can promote the program on their social media platform.
In the “Activity types page:
- Click “New”
- Select “Custom Activity”
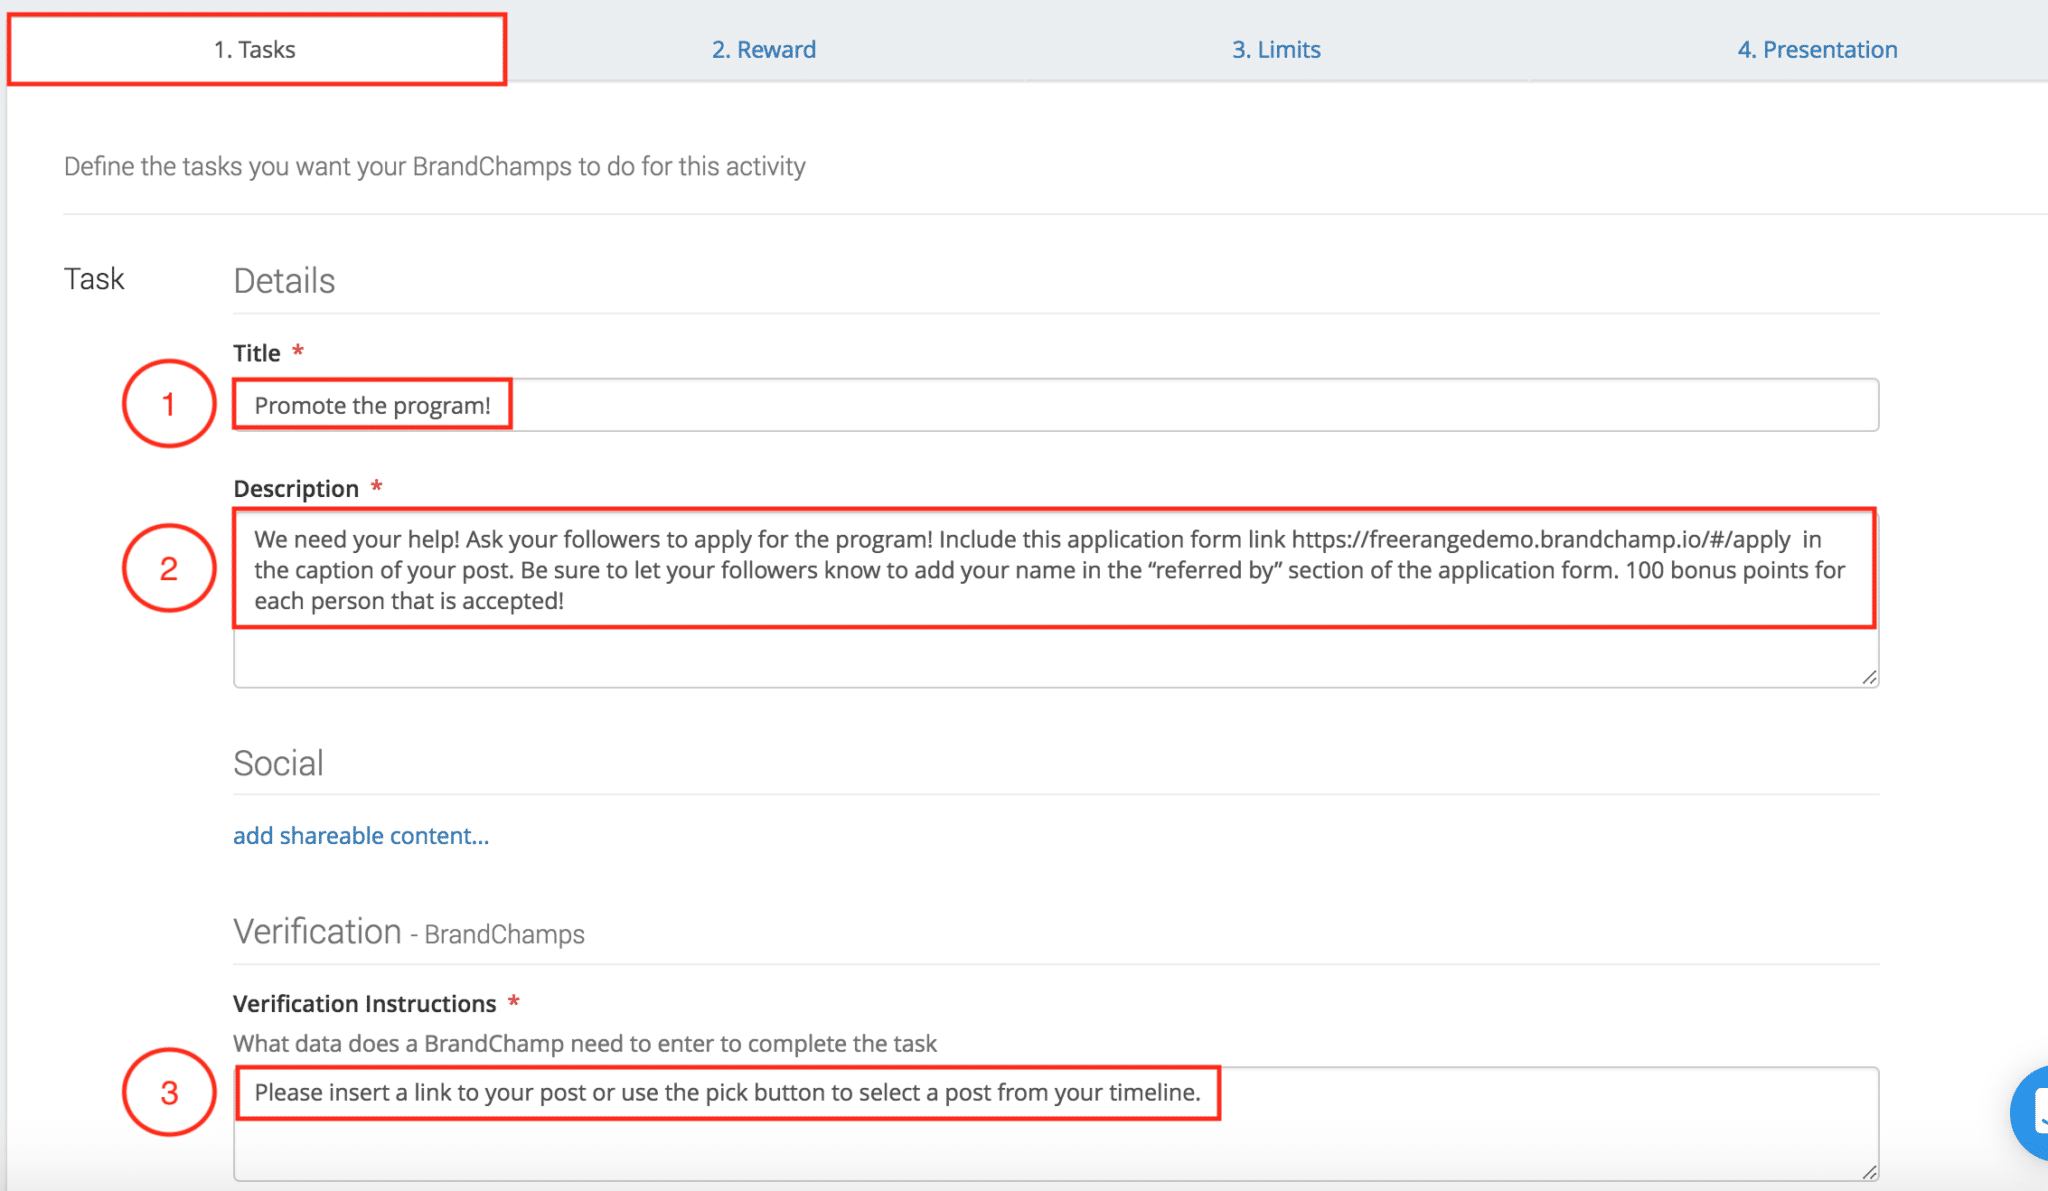
- Enter the Title – “Promote the Program!”
- Enter the Description –We need your help! Ask your followers to apply for the program! Include this application form link https://freerangedemo.brandchamp.io/#/apply in the caption of your post. Be sure to let your followers know to add your name in the “referred by” section of the application form. 100 bonus points for each person that is accepted!
- Enter the Verification Instructions – “Please insert a link to your post or use the pick button to select a post from your timeline.”
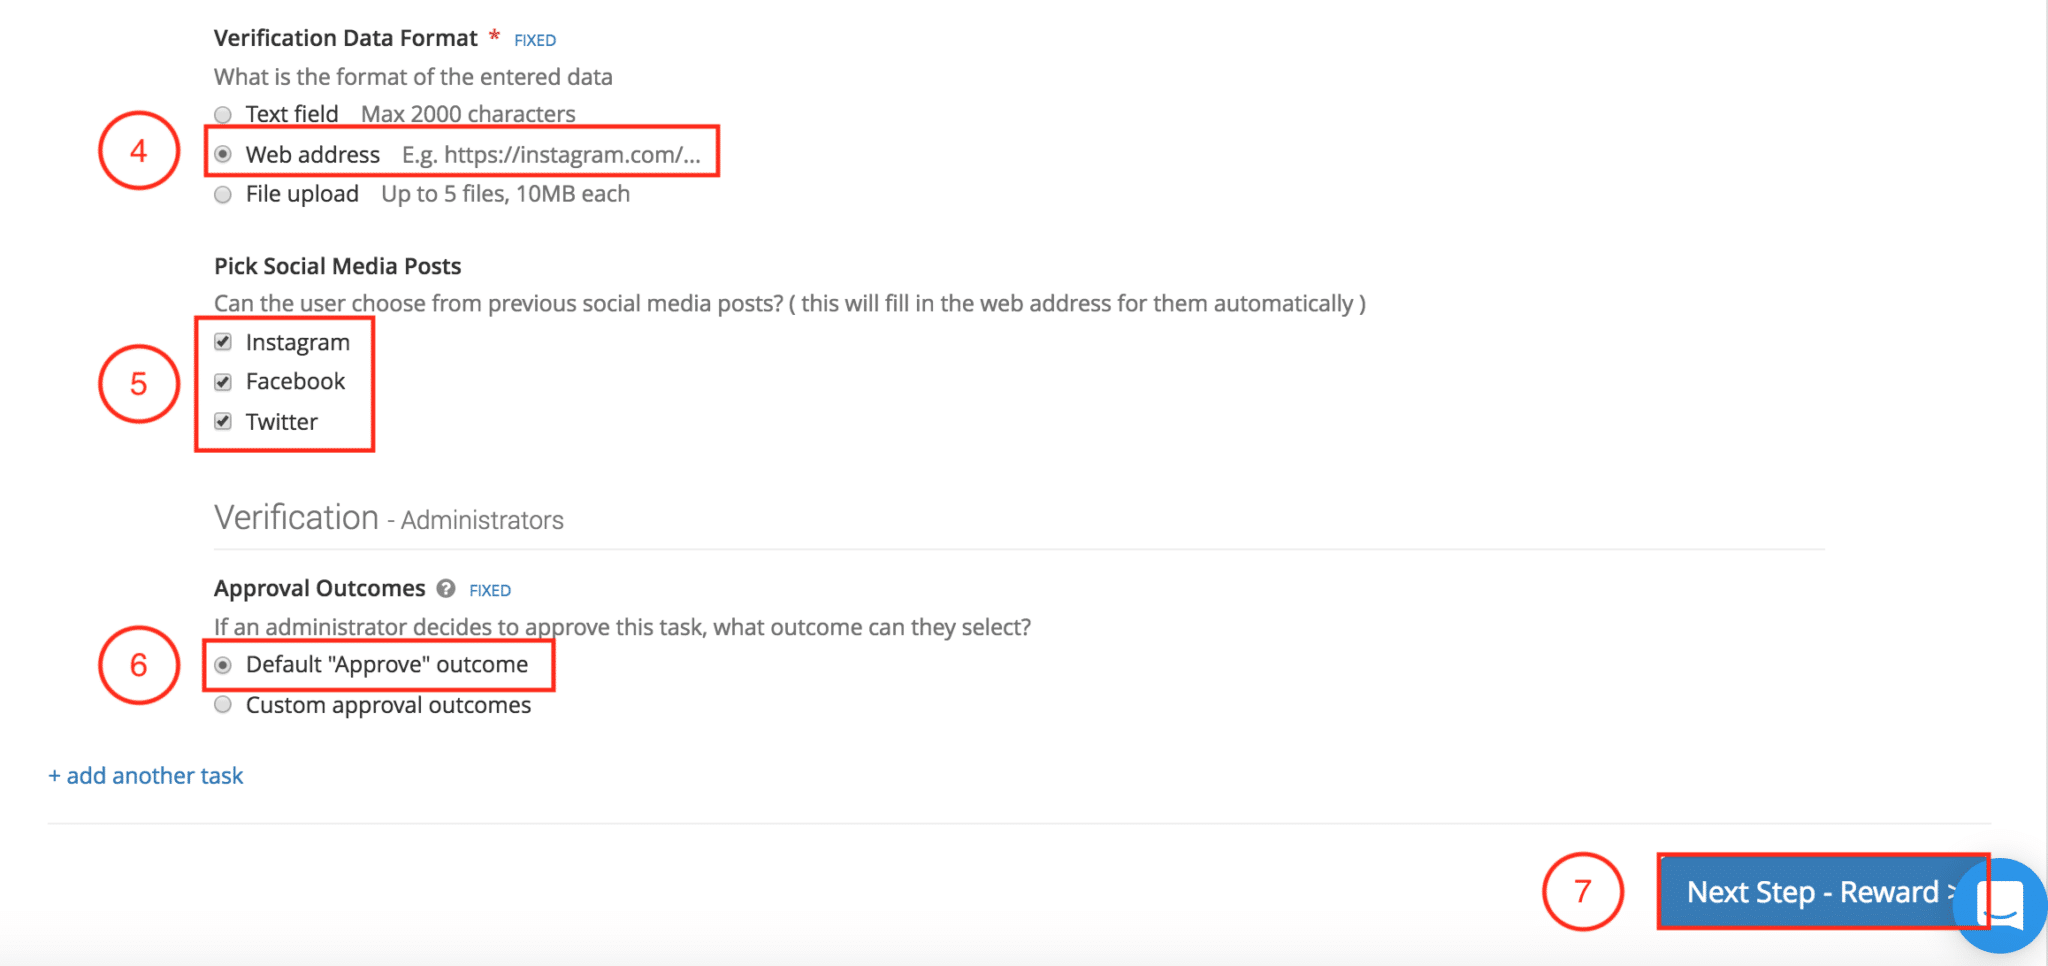
In the “Verification Data Format” section:
- Select “Web Address”This will allow the ambassador to submit a social media post or URL link
- Mark the box for “Instagram”, “Facebook”, “Twitter”
- Select “Default “Approve” Outcome”A Default Approve Outcome will allow you to either “Approve” or “Reject” an activity
- Click “Next Step – Reward”
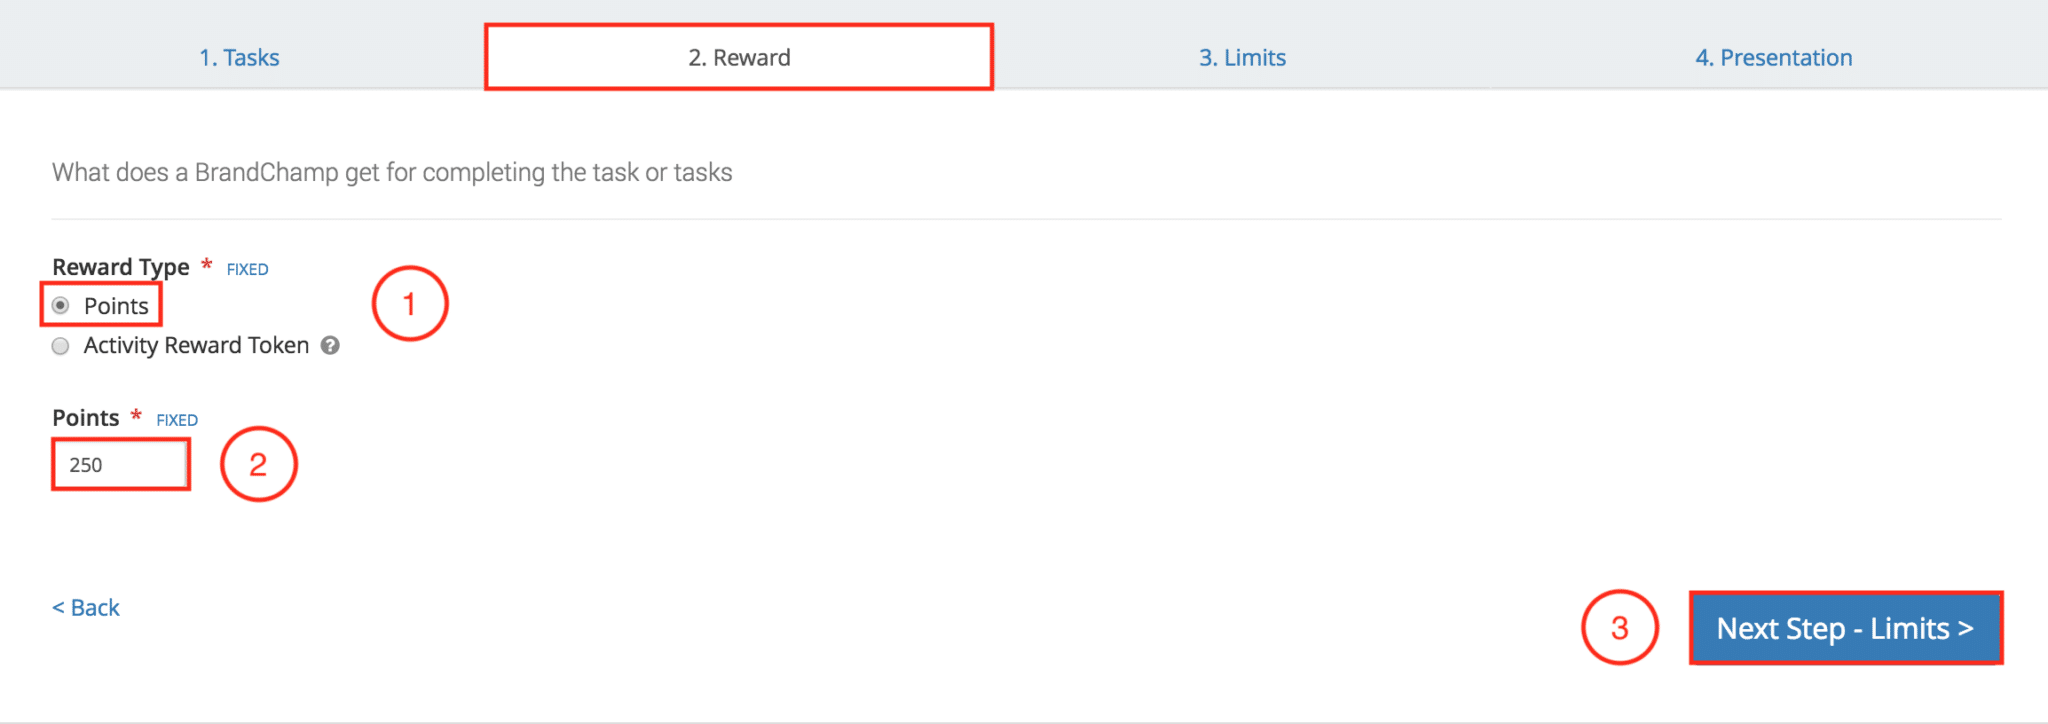
To set up the reward:
- Select “Points”
- Enter “250”Points
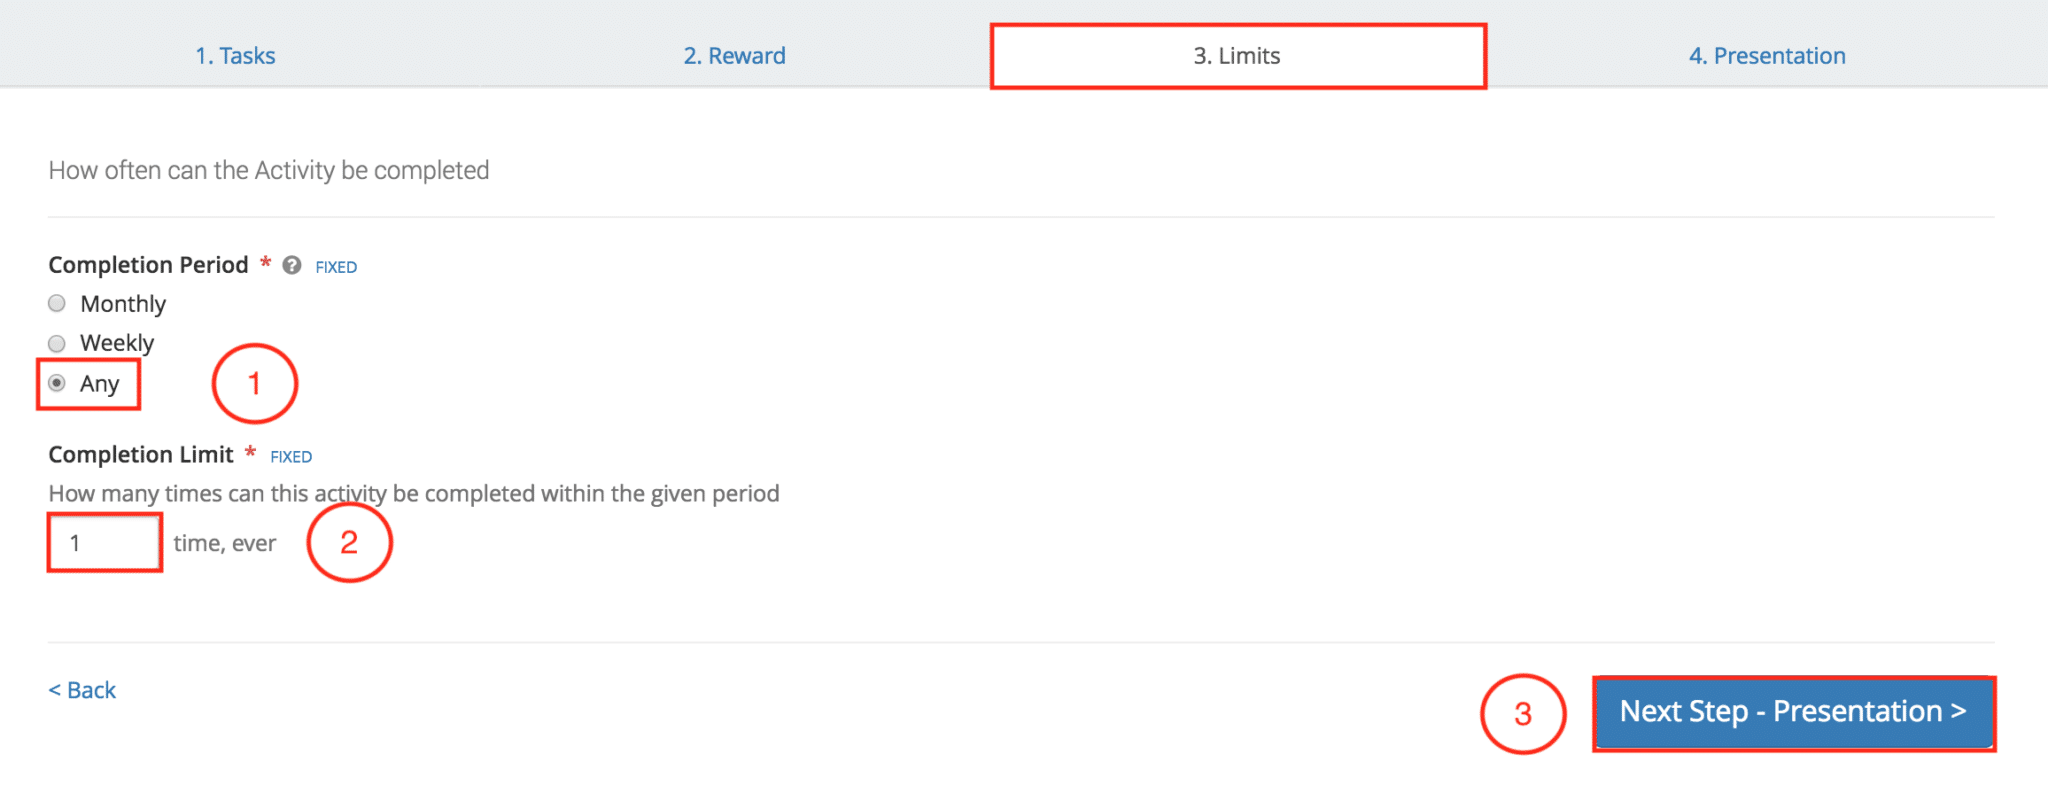
- Click “Next Step – Limit”
- Select “Any”
- Enter “1” for completion limit”
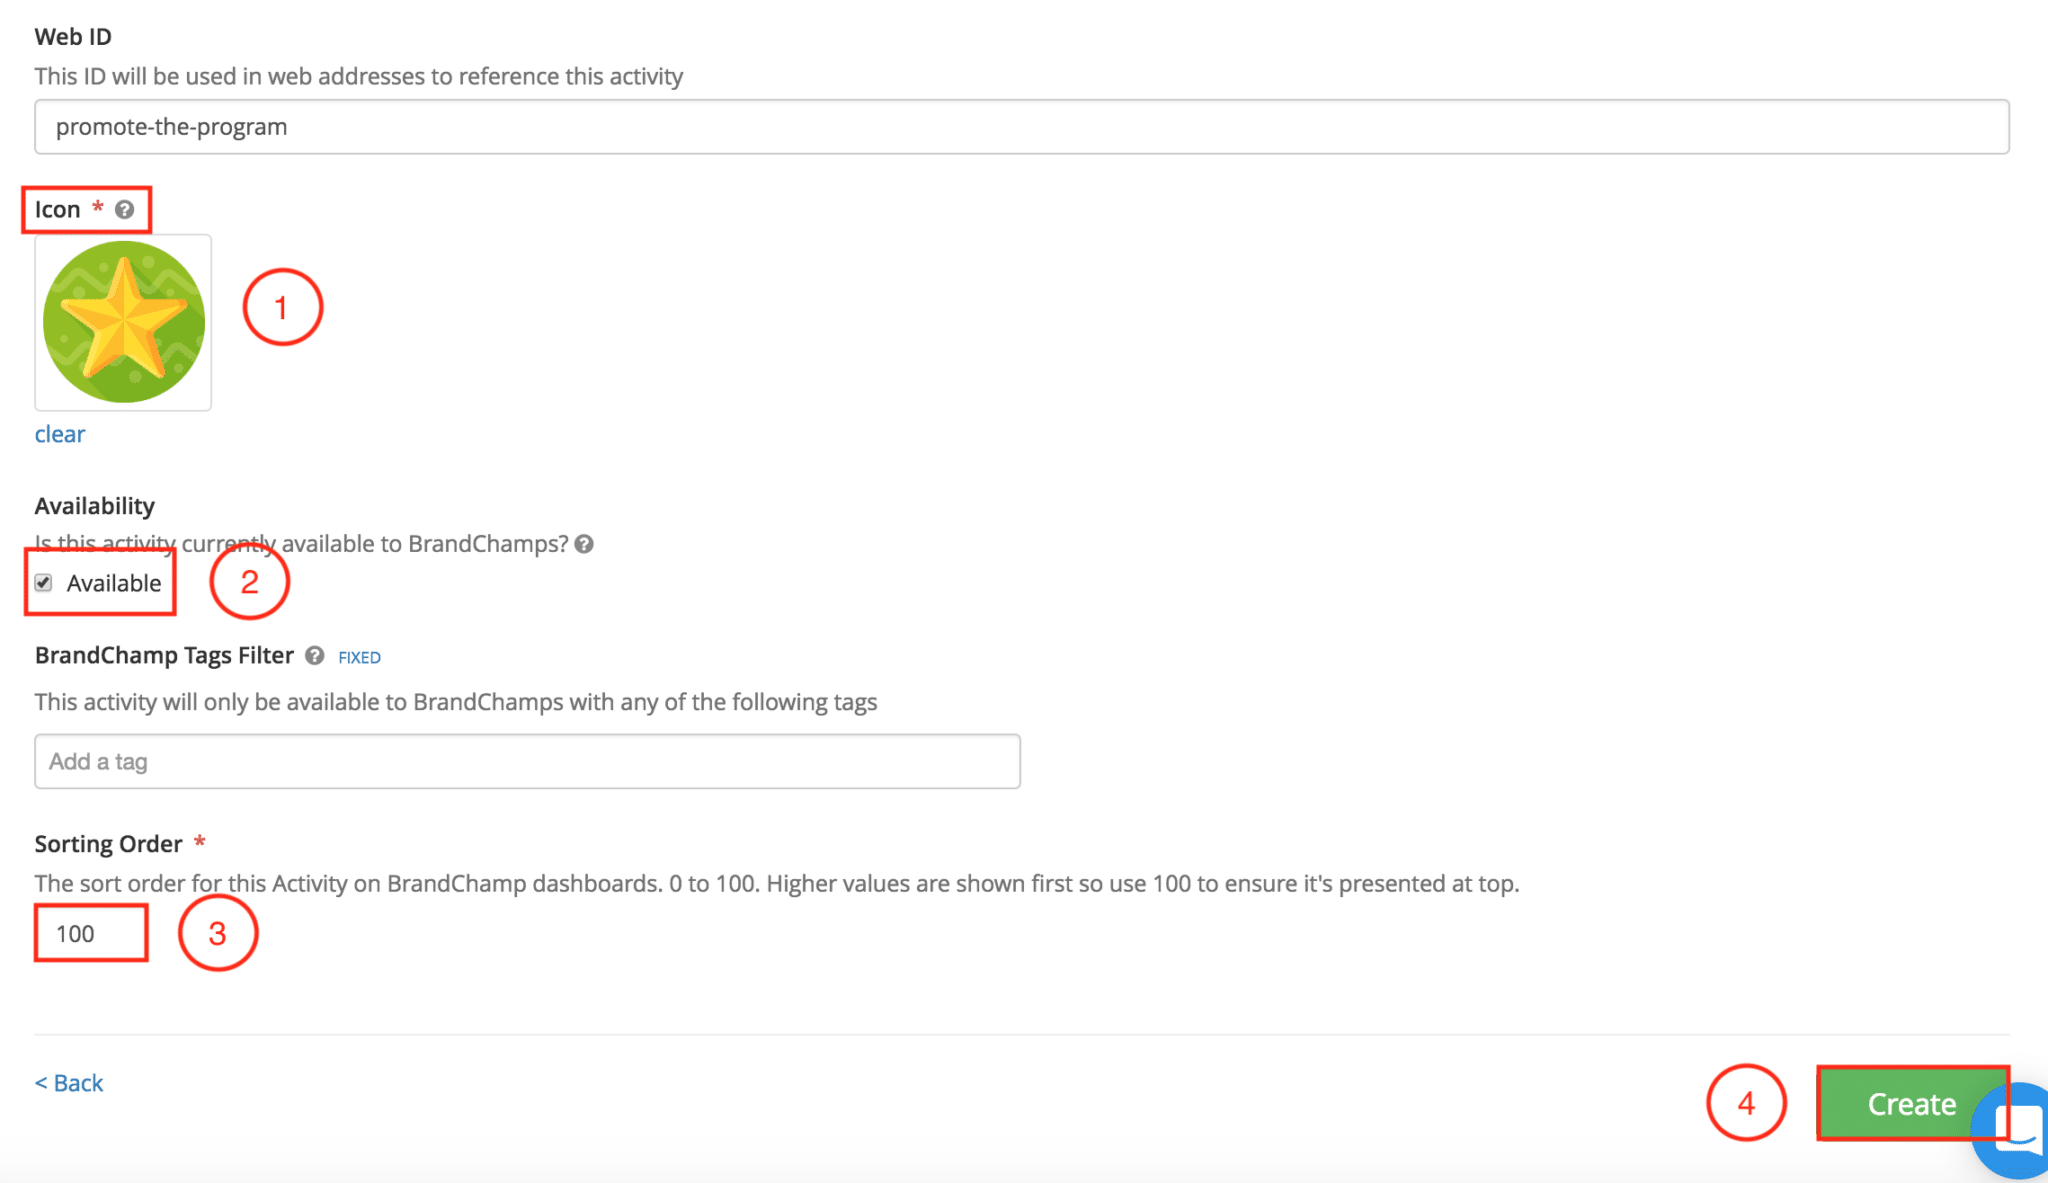
- Click “Next Step – Presentation”
- Select an “Icon”
- Mark the activity “Available”
- Enter“100 Sorting Order” This will place the activity at the top of the ambassador’s activity list
- Click “Create”
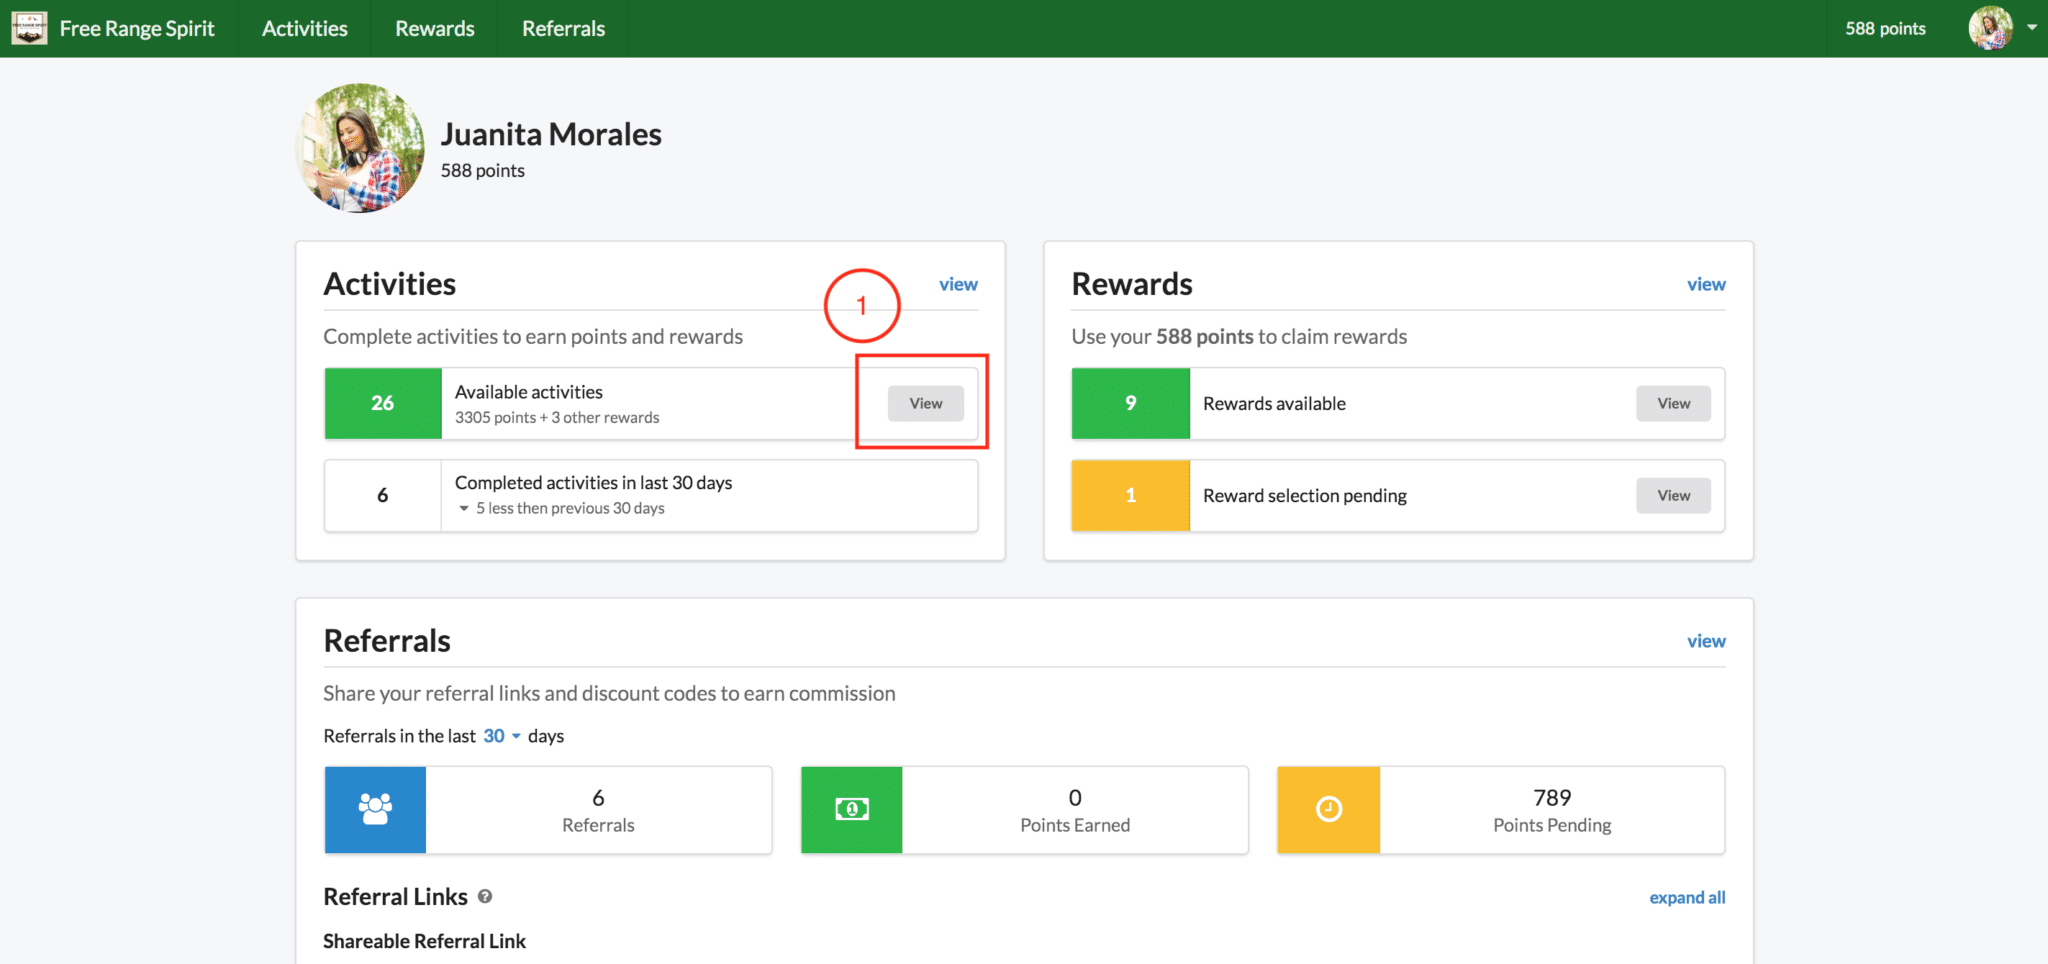
Viewing Activity Layout in Ambassador Portal
After creating the 2 activities above, you can then view the activities’ layout in the ambassador portal.
By checking the layout of your created activities, you can be sure that ambassadors will not run into any issues with completing the activity.
To review Activities in the Ambassador portal:
- Click View
Activity #1
Activity #2
By sending an email update, you can engage your ambassadors about the 2 new activities that you just created and the goals of your brand.
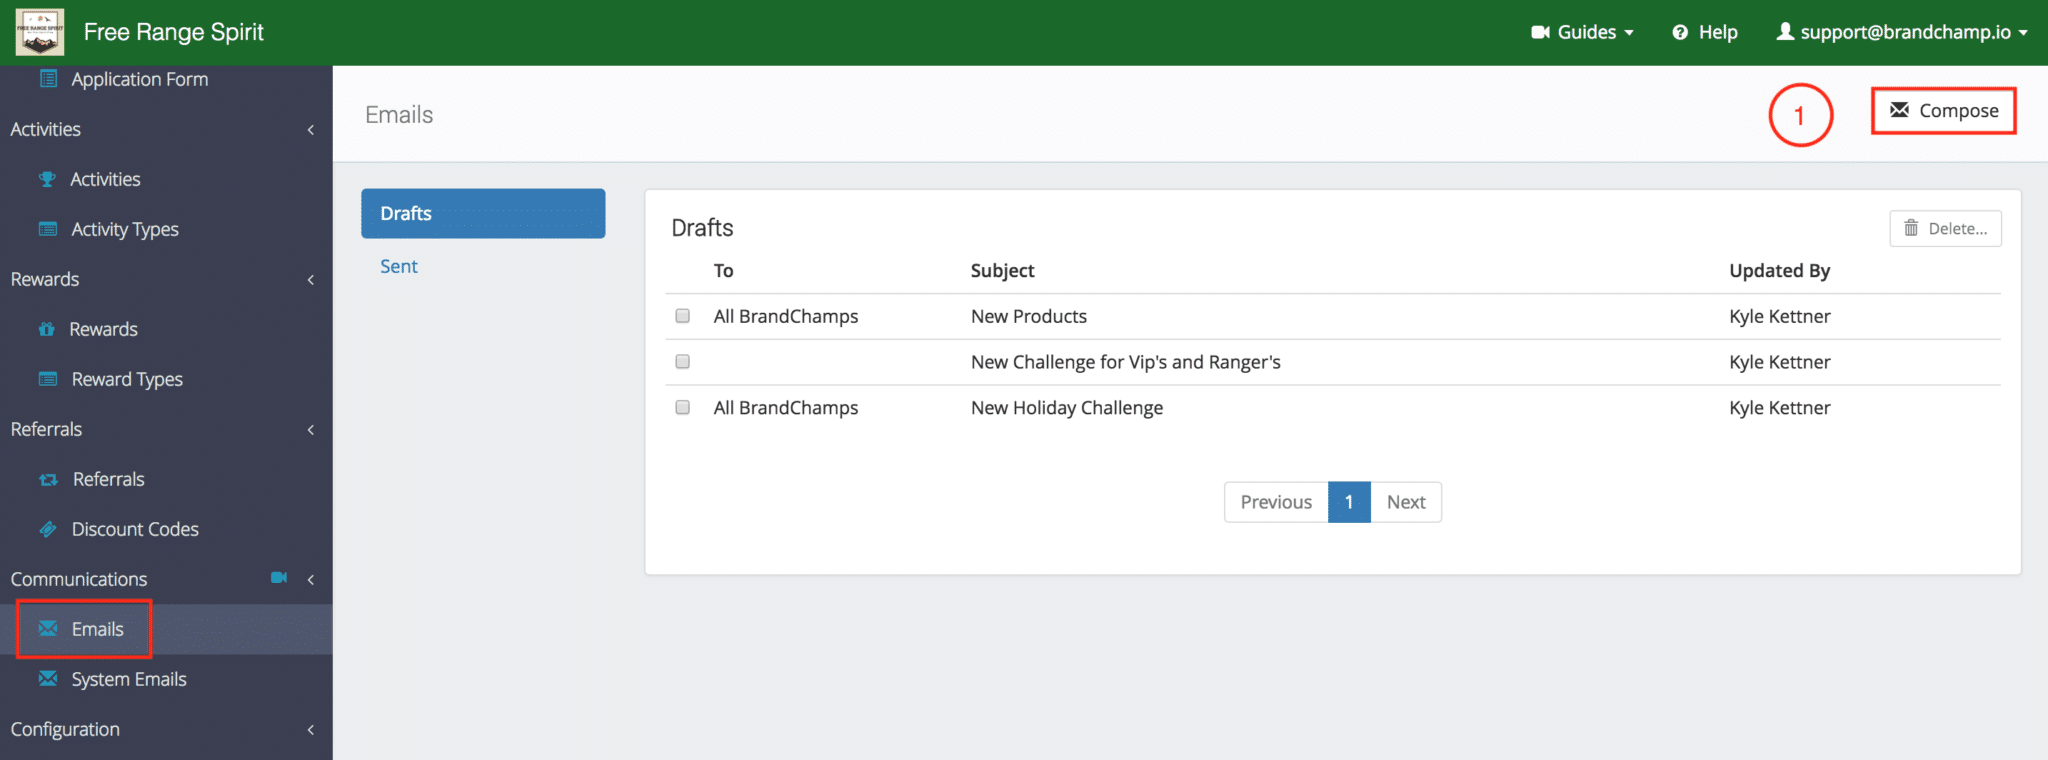
Email Update
The goal for this email update will be to provide a link to the activities page that ambassadors can easily click on after reading the email.
To send an email, go to “Emails” page under the “Communications” section.
In the “Emails” page:
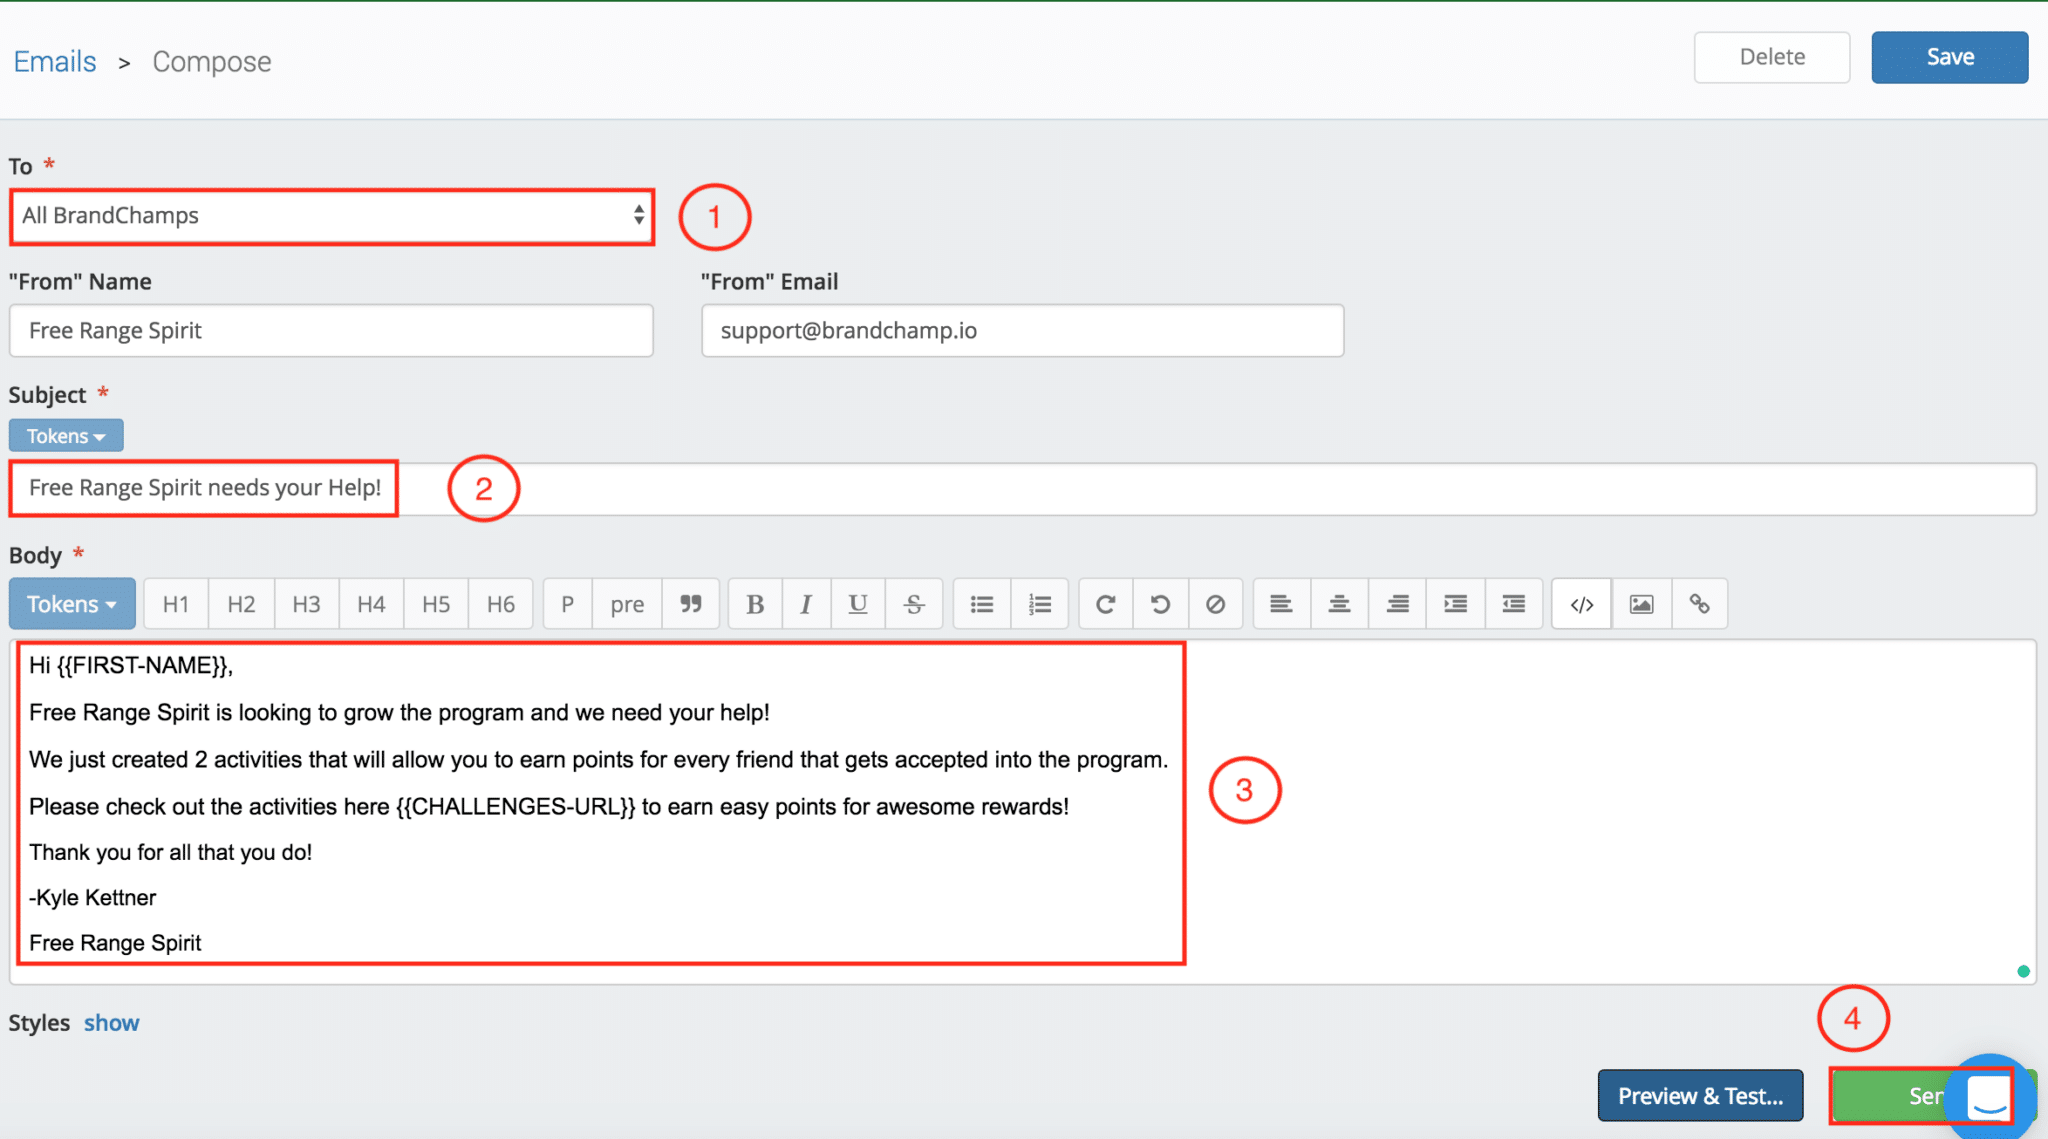
- Click “Compose”
- Select “All BrandChamps”
- Enter the subject – “Free Range Spirit needs your Help!”
- Enter the Body –
Hi {{FIRST-NAME}},
Free Range Spirit is looking to grow the program and we need your help! We just created 2 activities that will allow you to earn points for every friend that gets accepted into the program. Please check out the activities here {{CHALLENGES-URL}} to earn easy points for awesome rewards. Thank you for all that you do!
-Kyle Kettner
Free Range Spirit
To insert personalized tokens (i.e FIRST-NAME, CHALLENGES-URL) choose a token from the “Tokens” drop down.
FIRST-NAME: The ambassador’s first name will be filled
CHALLENGES-URL: The URL for the activities page in the ambassador portal will be filled - Click “Send”
Marking Activity as Unavailable
After completing your recruiting push with the 2 activities above, you can then save the activities to be used again at a later date.
Instead of deleting the activities, you can mark them as “unavailable” so that ambassadors are no longer able to view them.
To make an activity “Unavailable” simply un-mark the “Availablity” box in the activity’s presentation tab and click “Update” to use them again at a later date.
Closing
By following this recruiting process, you can easily mobilize your ambassadors to help you find quality participants to grow your program. As your ambassador’s friends are accepted, brand loyalty also increases amongst your ambassadors because they know that their friends are part of the community.
If you’re just getting started, take the time to learn how to design a successful brand ambassador program before going all-in on recruiting.
Kyle Kettner
Kyle Kettner is the Customer Success Manager at BrandChamp.io, an ambassador management software that helps brands automate their ambassador, influencer, and affiliate marketing programs.
Subscribe our newsletter
Subscribe to get our latest news, features, and any updates.
Share article to:
How BrandChamp helped brands

Learn how sports nutrition brand U Perform transformed its ambassador program with BrandChamp—streamlining recruitment, automating rewards, and growing from a founder-led network to a scalable, revenue-generating community.
More from BrandChamp